# How to Build a Basement Home Gym: 7-Step Toronto Guide
Quick answer. A real basement home gym buildout is a multi-trade renovation, not a one-weekend project. This guide walks through the seven-step process we use at RenoHouse for Toronto and GTA gym buildouts — from initial slab assessment to final commissioning — with realistic timelines, permit notes, and trade sequencing.A real basement home gym buildout is a multi-trade renovation, not a one-weekend project. This guide walks through the seven-step process we use at RenoHouse for Toronto and GTA gym buildouts — from initial slab assessment to final commissioning — with realistic timelines, permit notes, and trade sequencing. For the full cost framework that anchors this process, start with our Basement Home Gym Toronto 2026 Guide.
Overview: The Seven Steps
- 1. Assessment and design (1–2 weeks)
- 2. Permits + drawings (2–6 weeks, depending on scope)
- 3. Demolition and prep (2–5 days)
- 4. Framing, electrical, HVAC rough-in (1–2 weeks)
- 5. Insulation, vapor management, drywall (1 week)
- 6. Flooring, mirrors, fixtures (1 week)
- 7. Equipment install, AV commissioning, final walkthrough (3–5 days)
Total: 1–8 weeks depending on tier. Permit-pending periods account for the variability.
Step 1: Assessment and Design (Week 1–2)
The single most important step, and the one most often skipped in DIY-spec buildouts.
Slab Assessment
- Thickness check — most residential basement slabs are 4 inches. We core-drill or assess via existing penetrations. 4-inch slab handles all home gym loading.
- Levelness check — laser level reveals high/low spots. >1/4" variation over 10 ft typically requires self-leveler.
- Moisture check — 24-hour plastic-sheet moisture test on the slab. Any visible condensation under the sheet means we need a vapor barrier under flooring.
- Crack inspection — surface hairlines are normal. Active structural cracks need addressing before flooring.
Ceiling Height
Measured at multiple points (not just the middle of the room — duct soffits and beams matter). Reported as finished height after flooring + ceiling assembly.
- Below 7'2" — gym not viable; recommend underpinning first
- 7'2"–7'6" — viable for short users, no overhead pressing
- 7'6"–8'0" — viable for most users
- 8'0"+ — full freedom
Electrical Load Calculation
- Existing panel size (100A, 125A, 150A, 200A)
- Existing load on each leg
- Available capacity for new 240V circuits
- Likely panel upgrade requirement (most 100A homes need upgrade for serious connected fitness)
HVAC Route Mapping
- Existing supply and return runs
- Ductwork capacity for adding a supply
- Mini-split feasibility (where the condenser would mount, refrigerant line route)
Egress and Access
- Doorway width (equipment delivery — Tonal panel, treadmills are large)
- Stair clearance (treadmills assembled vs. disassembled)
- Egress window if creating a sleeping zone or future legal use
Design Drawings
We produce floor plans showing:
- Equipment layout with usage clearance
- Mirror wall location
- Outlet and 240V circuit locations
- HVAC supply/return locations
- AV equipment locations
- Sound dampening zones
Step 2: Permits and Drawings (Week 2–8)
Building permit triggered by:
- New partition walls
- New circuits (240V or new general circuits)
- New HVAC equipment
- Bathroom or wet zone integration
- Window enlargement (egress)
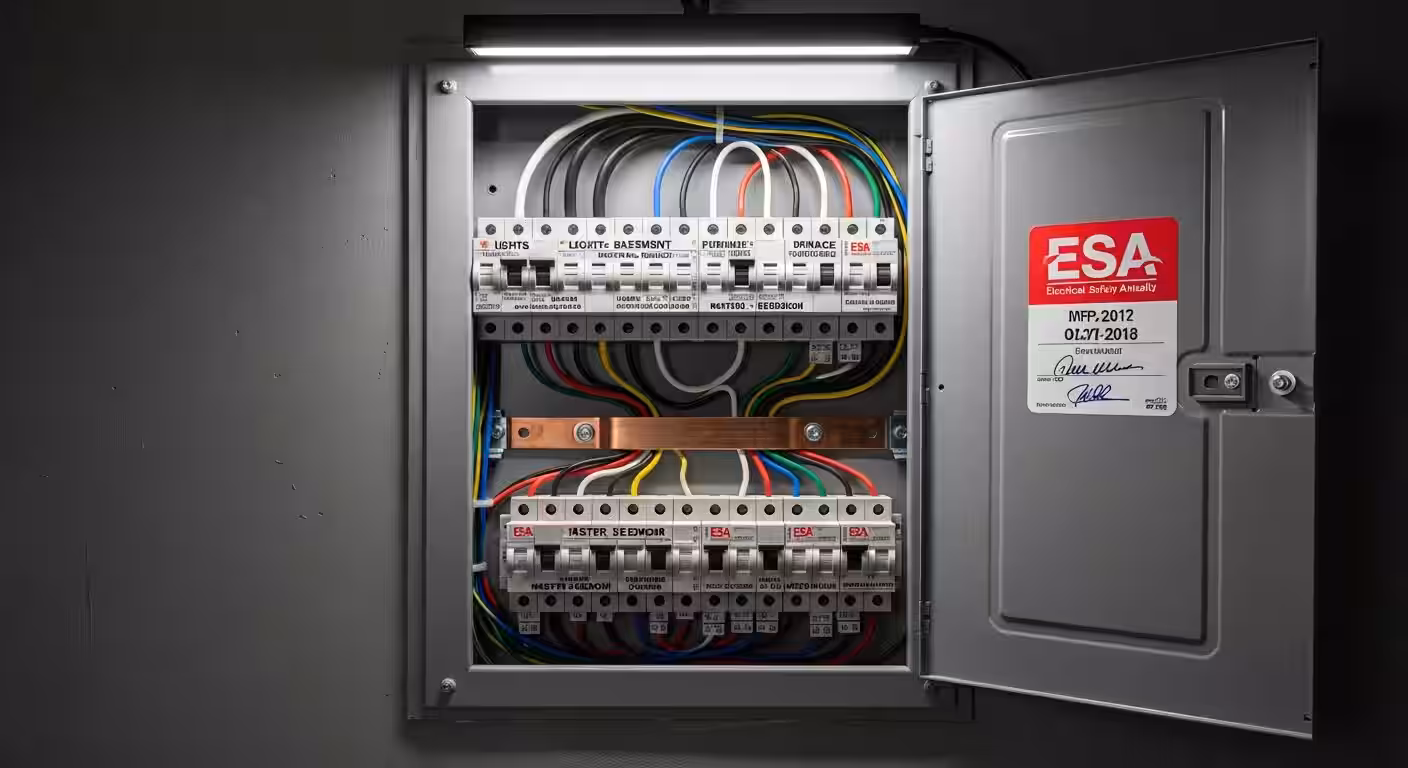
ESA permit always required for new circuits.
City of Toronto permit: $400–$900. Typical wait: 4–8 weeks for residential.
For permit detail and timeline, RenoHouse handles all paperwork as part of the project — see our Basement Home Gym Toronto 2026 Guide for the full permit framework.
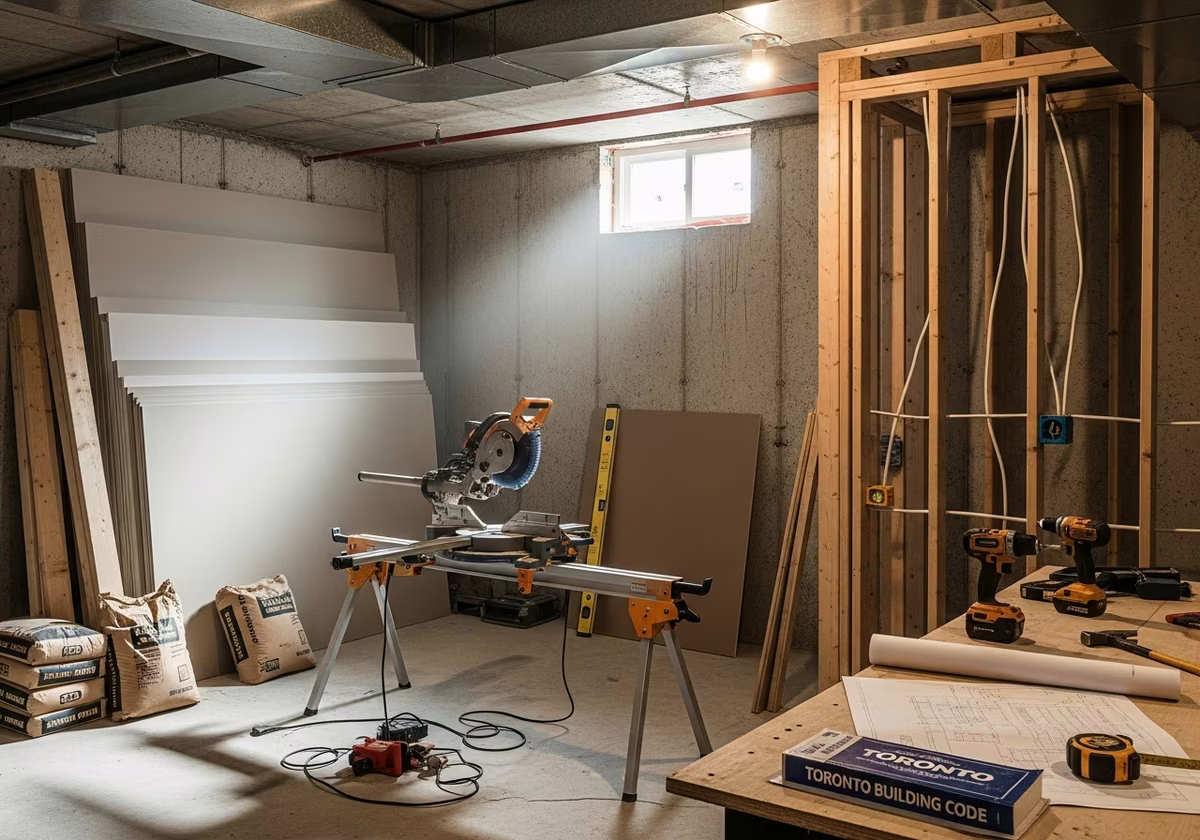
Step 3: Demolition and Prep (2–5 days)
If you're starting from a finished basement:
Need professional home renovation?
Call RenoHouse at 289-212-2345 or get a free estimate today.
Get Free Estimate →- Remove existing flooring (carpet, vinyl, laminate)
- Remove baseboards and door trim that's affected
- Patch any slab issues (crack injection, self-leveler if needed)
- Apply vapor barrier (6 mil poly) where required
- Bag and remove debris
If you're starting from unfinished:
- Treat any moisture issues first (this is its own scope — basement waterproofing $5,000–$15,000)
- Frame perimeter walls if creating a separate room
- Run new HVAC trunk and electrical home-runs
This is where unexpected costs surface — especially basement moisture issues that weren't visible at assessment. We always inspect before quoting and flag risks honestly.
Step 4: Framing, Electrical, and HVAC Rough-In (1–2 weeks)
The "guts" of the project. Multi-trade coordination matters here.
Framing
- Partition walls if creating a dedicated gym room
- Backing for mirror wall (2x6 or 2x8 horizontal blocking at 4 ft and 6 ft above floor — every wall mirror over 4 sq ft needs this for code-compliant Z-clip mounting)
- Backing for Tonal mounting (Tonal needs to be lag-bolted into studs at specific heights)
- Backing for TV / AV screens
- Soffits to hide HVAC and AV cable
Electrical Rough-In
- 240V circuits run from panel to equipment locations
- 120V general circuits (4–6 outlets minimum, all on dedicated 20A breakers — gym equipment doesn't share well with general residential loads)
- Lighting circuit — separate from outlet circuits
- AV/data low-voltage routing
- Wi-Fi mesh node power location
All work to ESA standard. Our licensed electricians pull the ESA permit, do the rough-in, and schedule the rough-in inspection.
For full electrical detail, see Home Gym Electrical Requirements: 240V for Treadmill, Tonal, Peloton.
HVAC Rough-In
- Standard tier: extend new supply and return from existing trunk
- Premium tier: refrigerant lines and condensate route for ductless mini-split (condenser typically mounted on exterior wall or in unobtrusive corner of basement)
- Inline exhaust fan + duct to exterior
For HVAC detail, see Home Gym Ventilation: HVAC for 600W+ Heat Output.
Step 5: Insulation, Vapor Management, Drywall (1 week)
Insulation strategy depends on basement condition:
- Existing finished basement with insulation: usually no change needed
- New partition walls: Roxul Safe'n'Sound for sound dampening (not thermal)
- Acoustic ceiling: insulation in joist bays + resilient channel + double 5/8" drywall
Vapor management:
- Slab moisture barrier under flooring (6 mil poly minimum)
- Wall vapor barrier per OBC for any framed exterior wall
- Bathroom or wet-zone separation if integrated with sauna or shower
- Type X (5/8") for ceiling between gym and upstairs (impact and fire rating)
- Standard 1/2" for partition walls
- Mold-resistant for any wall within 12" of slab or near a wet zone
For acoustic engineering detail, see Home Gym Lighting & Acoustics: Toronto Buildout Guide.
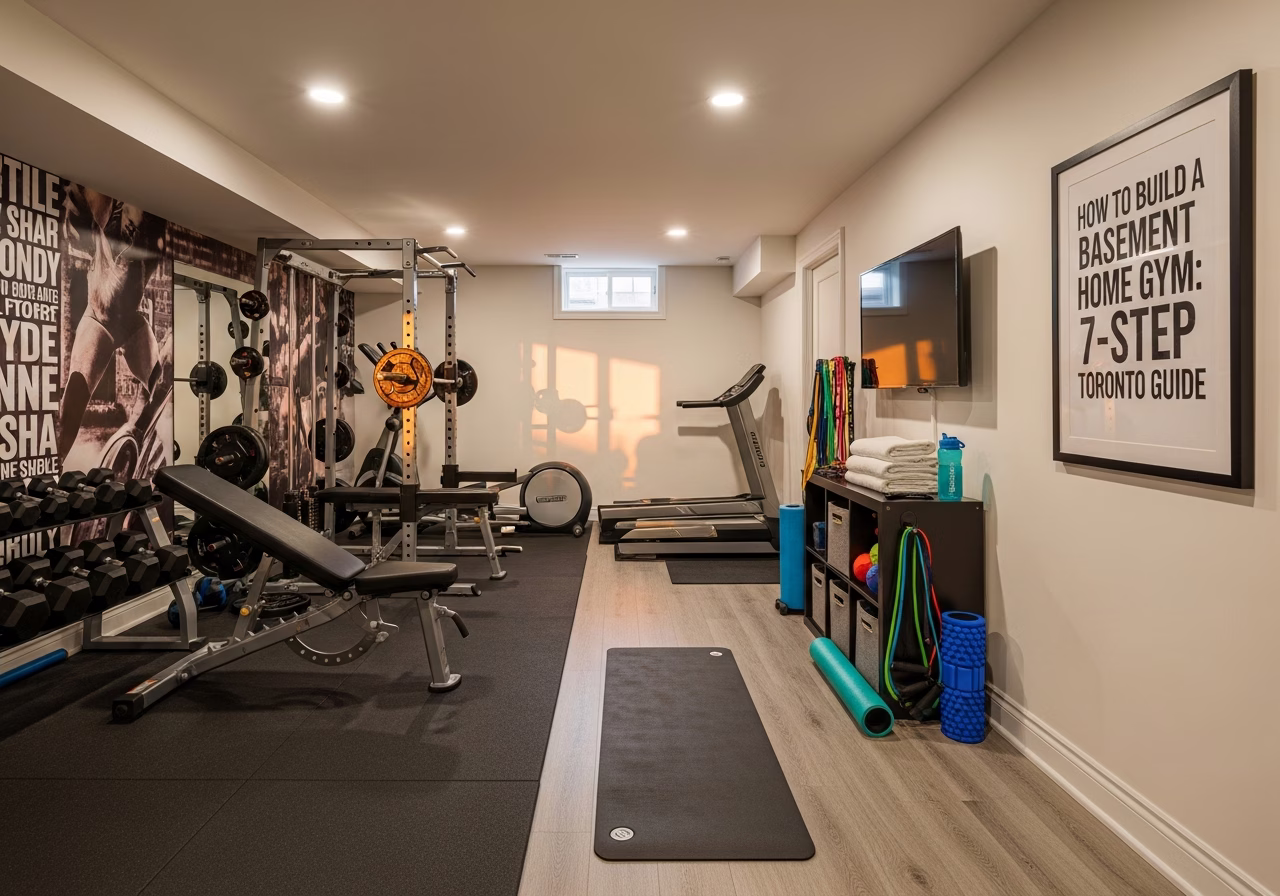
Step 6: Flooring, Mirrors, and Fixtures (1 week)
The phase where the room visibly becomes a gym.
Flooring
- Underlay if specified
- Rubber roll (glued or double-side taped to slab) or interlocking rubber tile
- Deadlift platform island built (3/4" plywood + 25mm rubber)
- Transitions to adjoining areas (door reducers, baseboard reinstall)
For flooring detail and brand recommendations, see Home Gym Flooring: Rubber Tile vs Roll vs Mat Toronto.
Mirror Installation
- Mirror mastic to studs (with backing already in place from framing step)
- J-channel bottom rail
- Z-clip safety brackets at top
- Edge polishing if specified
- Cleaning and final inspection
Light Fixtures
- 4000K LED downlights or panel troffers
- CRI 90+
- Dimmable with dedicated dimmer (separate from outlet circuits)
- Smart-control if specified (Lutron Caseta typical)
AV
- Bluetooth/Sonos ceiling speakers
- Wall-mounted training screen if specified
- Cable management
Step 7: Equipment Install, Commissioning, Final Walkthrough (3–5 days)
The room is done; now you actually move in.
Equipment Delivery and Install
- Tonal: hardwired to 240V/20A, mounted to backing
- Treadmill: positioned on isolation pad, plugged into 240V/20A
- Peloton: plugged in, paired
- Rack: assembled, anchored to slab if specified, leveled
- Free weights: stored on rack
- Mirror: cleaned
Commissioning
- All circuits tested under load
- HVAC tested with simulated workout (run treadmill and check temperature trajectory)
- Sound levels measured at key locations (typically upstairs bedroom directly above gym)
- AV system paired with phones/devices
- Wi-Fi confirmed strong throughout space
Final Walkthrough
- Punch list — anything we missed
- Operation manuals for all equipment
- Maintenance schedule (rubber flooring, HVAC, mirror cleaning)
- Warranty paperwork
- City inspections passed (we handle scheduling)
Common Sequencing Mistakes
- 1. Equipment delivered before flooring — equipment then sits in another room for weeks, or worse, on the slab during flooring install (can't happen).
- 2. Framing without electrical layout — circuits get run after drywall, requiring patching.
- 3. Mirrors before drywall paint cures — mastic doesn't bond properly.
- 4. HVAC rough-in after drywall — opens walls again.
- 5. No backing for Tonal/TV — discovers at install time, requires drywall patch.
Multi-trade coordination is exactly why this isn't a DIY project for the full scope. Detail in DIY vs Professional Home Gym Toronto: Real Cost Comparison.
Realistic Timeline by Tier
| Tier | Step 1 | Step 2 | Steps 3–7 | Total |
|---|---|---|---|---|
| Basic | 1 wk | 0–2 wk | 1–2 wk | 1–4 wk |
| Standard | 1–2 wk | 4–6 wk | 3–5 wk | 8–13 wk |
| Premium | 2 wk | 6–8 wk | 5–8 wk | 13–18 wk |
The permit step is where wellness-suite builds (gym + sauna + plunge) extend significantly — full design-to-handover for those is 4–8 months. Detail in Home Gym + Sauna + Cold Plunge: Ultimate Wellness Suite.
---
Ready to start? RenoHouse manages every step of basement home gym buildouts across Toronto and the GTA — from slab assessment through final commissioning. Book a free assessment on our basement home gym buildout service page.
Sources & References
Authoritative sources cited in this guide:
- Ontario Building Code — OBC official text
- Toronto Building Permits — City permit portal
- Tarion Warranty — Ontario warranty regulator
- CSA Group Standards — Canadian standards
Continue Reading
- Basement Home Gym Toronto: Complete 2026 Cost & Build Guide
- Home Gym Cost Toronto: $5K Basic vs $50K Premium
- DIY vs Professional Home Gym Toronto: Real Cost Comparison