
# Wine Cellar Vapor Barrier and Insulation: Toronto 2026 Build Spec
Quick answer. Vapor barrier failure is the single most common cause of wine cellar mold and structural damage in Toronto. The physics is straightforward but counter-intuitive, and a contractor who has only built kitchens and bathrooms can easily get it wrong.Vapor barrier failure is the single most common cause of wine cellar mold and structural damage in Toronto. The physics is straightforward but counter-intuitive, and a contractor who has only built kitchens and bathrooms can easily get it wrong. This guide explains why the warm-side vapor barrier matters, the correct assembly stack for Toronto basements, and how to verify the build before drywall closes everything in.
For the full installation overview, see wine cellar installation Toronto 2026. For the build sequence, see how to build wine cellar basement Toronto.
The Physics in 60 Seconds
Moisture moves from warm to cool. In summer, the basement around the cellar sits at 22–25 C and 55–65% RH. The cellar interior is held at 12.5 C and 65% RH. Even though the relative humidity is similar, the absolute moisture content of the warm basement air is much higher. That moisture wants to flow into the cellar. It does so by diffusion through any wall that does not have a vapor barrier on the warm side.
When the moisture-laden air hits the cool surface of the cellar wall (or worse, condenses inside the wall cavity at the dew point), water forms. Water plus organic material (wood framing, paper-faced drywall) plus warmth at the dew-point plane equals mold within 18–36 months.
The vapor barrier on the warm side stops the diffusion before it reaches the cool, condensation-prone interior of the assembly. Get this stack right and the cellar lasts indefinitely. Get it wrong and you are tearing out drywall and racking in 3 years.
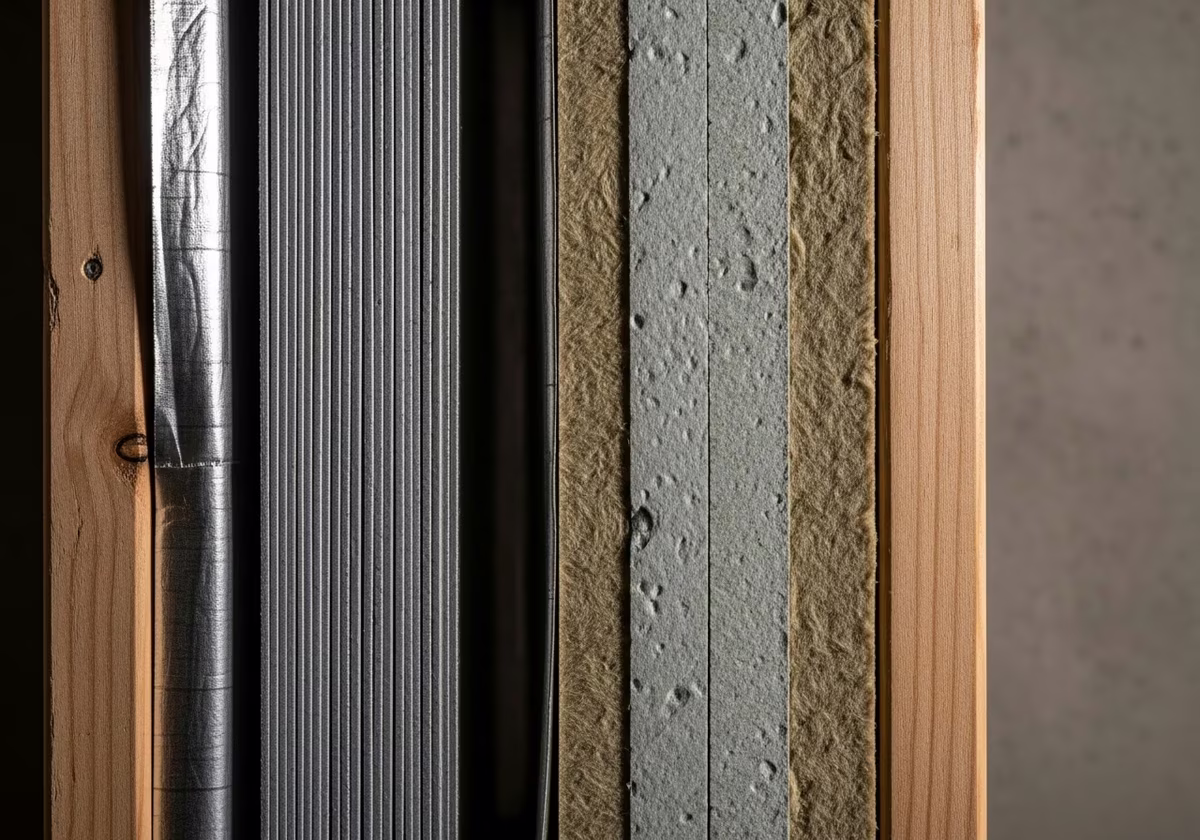
The Toronto Basement Cellar Wall Assembly (Correct)
Warm side (basement) → cool side (cellar interior):
- 1. Existing basement drywall (warm side, painted, finished basement).
- 2. Stud cavity, R-22 closed-cell spray foam. Closed-cell foam is itself a vapor retarder (perm rating around 0.8 at 2 inches), making this assembly extra-protected.
- 3. 6 mil polyethylene continuous vapor barrier, all seams sealed with acoustical sealant or vapor-barrier tape, taped to the slab and to the framing perimeter.
- 4. New 2x4 or 2x6 stud wall (cellar side). This is your "cellar wall" framing.
- 5. Cellar-side stud cavity, R-15 to R-22 closed-cell spray foam (additional thermal performance).
- 6. Mold-resistant drywall (CertainTeed M2Tech, USG SilentFX, or equivalent — Type X with mold-inhibitor).
- 7. Primer + finish paint (cellar interior).
Total wall thickness: 7–9 inches. Total R-value: R-30 to R-44.
For Walls Against Existing Foundation
If the cellar wall is the existing concrete foundation (typical in basement cellars), the stack changes:
- 1. Concrete foundation (cool side from the cellar's perspective; warm-and-moist side from the soil's perspective in summer).
- 2. 2 inches of closed-cell spray foam directly on concrete, R-12. This is itself a vapor barrier (perm < 1).
- 3. 2x4 stud wall, set 1" off the foam, anchored to floor and ceiling.
- 4. R-15 closed-cell spray foam in the stud cavity.
- 5. 6 mil polyethylene continuous vapor barrier on the warm (cellar interior) side of the framing if the cellar interior is warmer than the foundation. Wait — for a wine cellar, the cellar interior is the cool side. So no second vapor barrier here; the closed-cell foam against the concrete is doing the moisture-management work.
- 6. Mold-resistant drywall.
- 7. Primer + finish paint.
This is one of the assembly differences that catches general contractors off guard. The "warm side" in a wine cellar context is the basement around the cellar, not the cellar itself. Vapor barrier orientation flips relative to a normal heated room.
For Ceilings (Cellar Below Heated Room)
The most common cellar ceiling assembly:
- 1. Heated room above (warm side).
- 2. Floor finish above (e.g., engineered hardwood living room floor).
- 3. Subfloor (3/4" plywood).
- 4. Joist cavity, R-30 batt + R-10 closed-cell foam top-up to R-40 total. Closed-cell at the top of the joist cavity acts as the vapor barrier.
- 5. 6 mil polyethylene continuous on the warm side of the new framing layer (if any).
- 6. Furring channel (resilient channel optional for sound isolation).
- 7. Mold-resistant drywall (cellar ceiling).
- 8. Primer + finish paint.
For ceilings, the closed-cell foam at the top of the cavity (against the warm subfloor) is the primary vapor barrier. A 6 mil poly layer below the foam is belt-and-suspenders insurance.
Why Open-Cell Foam and Mineral Wool Are Wrong (in This Application)
Open-cell spray foam is air-permeable and vapor-permeable. In a normal heated room it works fine paired with a separate vapor barrier. In a wine cellar, where moisture management is critical, closed-cell foam is the stronger choice because the foam itself becomes a vapor retarder, providing redundancy if the poly seal develops a tear or gap.
Mineral wool batt is moisture-tolerant but not vapor-resistant. Used alone in a cellar wall, it allows moisture diffusion right through. With a continuous, perfectly-sealed 6 mil poly on the warm side, mineral wool can work — but the difficulty of achieving truly continuous poly in real-world basements makes closed-cell foam the safer choice.
Recommendation: closed-cell spray foam everywhere in a Toronto wine cellar assembly, with continuous 6 mil poly added on critical walls for redundancy.
Need professional home renovation?
Call RenoHouse at 289-212-2345 or get a free estimate today.
Get Free Estimate →Vapor Barrier Detailing: Where Builds Fail
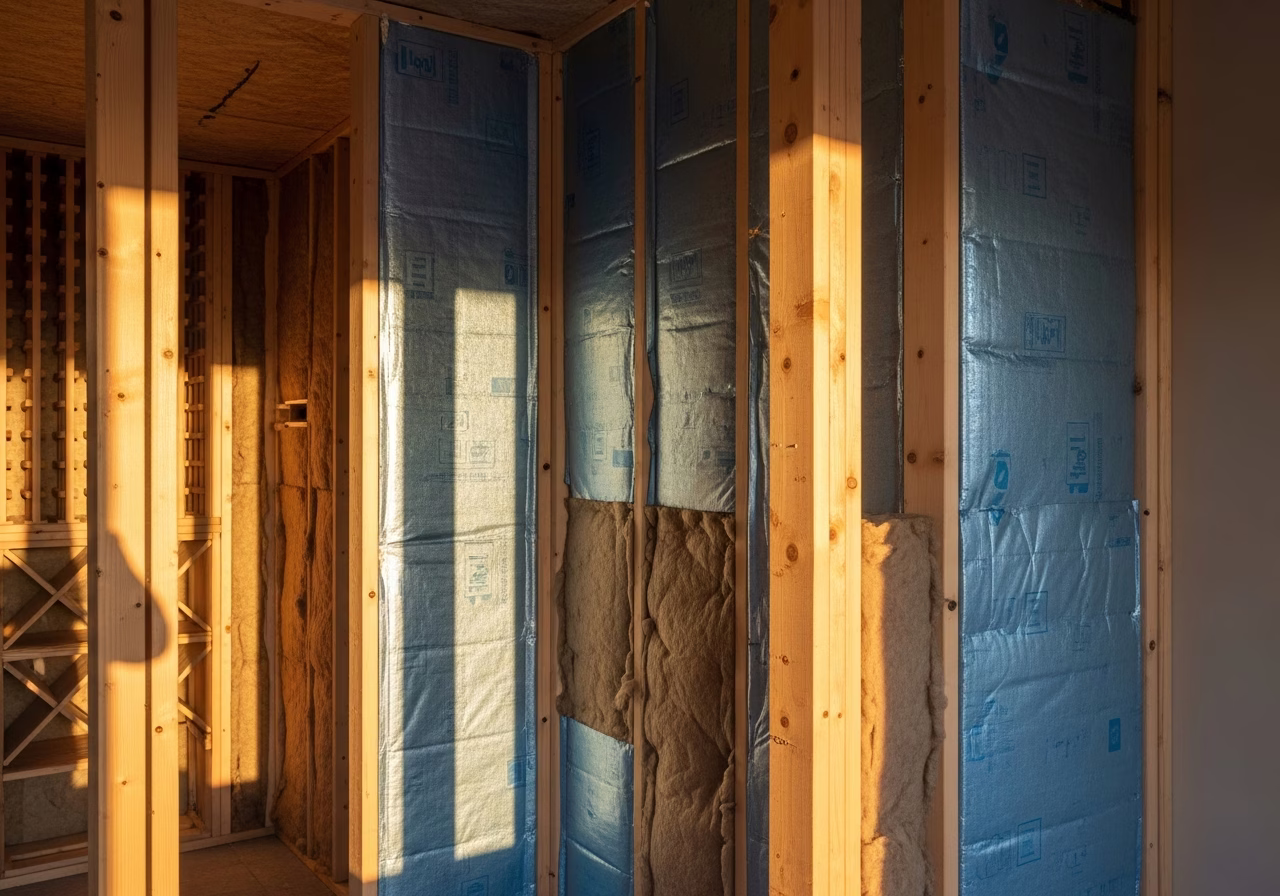
The 6 mil poly is only as good as its sealing. Critical detailing points:
- 1. Slab-to-wall transition. Tape the bottom of the poly to the slab with vapor-barrier tape, then run a continuous bead of acoustical sealant.
- 2. Wall-to-ceiling transition. Overlap the wall poly onto the ceiling poly by 8–12", taped.
- 3. Around door frame. Wrap the poly into the door rough opening, sealing to the frame.
- 4. Around electrical penetrations. Use a vapor-barrier electrical box (Lessar) or wrap and seal a standard box thoroughly. Every screw penetration through the poly is a potential failure point.
- 5. Around cooling unit penetration. Similar — wrap and seal.
- 6. Seams. Overlap 6", seal with acoustical sealant or vapor-barrier tape.
A poly install that is "mostly continuous, mostly sealed" performs noticeably worse than one that is fully continuous. The difference shows up 3–7 years later.
Verification Before Drywall
Before the cellar drywall closes the assembly in:
- 1. Visual inspection. All seams overlapped and sealed. No visible tears or punctures. Tape continuous around door frame and penetrations.
- 2. Smoke pencil test. Walk the cellar interior with a smoke pencil during a rough-in pressure test. Smoke pulled through any leak is visible.
- 3. Photograph everything. Build a photo record of the vapor barrier before drywall. Useful for warranty claims and future renovations.
A contractor who refuses to let the homeowner walk the assembly before drywall is hiding something. A quality contractor walks you through it and explains the detailing.
Floor Insulation
For the cellar floor:
- 1. Existing concrete slab. No vapor barrier needed (slab is below grade and cool).
- 2. 2 inches of closed-cell foam on top of the slab, R-12. Provides thermal break and prevents condensation on the cool slab surface in summer.
- 3. 3/4" plywood subfloor or 1/2" cement board (depending on flooring choice).
- 4. Schluter Ditra membrane (for tile) or engineered hardwood underlayment.
- 5. Finish flooring (porcelain, stone, engineered hardwood, cork).
Skipping the closed-cell foam under the floor means the slab surface in summer can drop below the cellar dew point, condensing moisture under the flooring. Within 12–24 months, mold under the floor.
Insulation Performance: Why R-22 Walls
R-22 is the practical Toronto cellar wall target because:
- Below R-15: Cellar holds temperature only with continuous cooling (no thermal mass). Cooling unit cycles too often.
- R-15 to R-22: Sweet spot. Cooling unit cycles modestly. Cellar holds temperature for 12–24 hours after a cooling unit shutdown.
- R-22 to R-30: Diminishing returns. Cooling unit barely runs. But assembly cost increases substantially.
- Above R-30: Almost no further benefit.
For ceilings, R-40 is the target. Higher than walls because the ceiling is in contact with warmer air above.
What If the Basement Has Existing Insulation?
Many Toronto basements have existing wall insulation (often R-12 mineral wool batt). When converting a basement closet to a wine cellar:
- Option A: Strip the existing batt, replace with R-22 closed-cell foam. Best performance, highest cost.
- Option B: Leave the batt, add a new 2x2 or 2x4 wall on the cellar side, add closed-cell foam in the new wall, and continuous poly between the two walls. Total R-30+. Lower cost, slightly more wall thickness.
- Option C: Leave the batt, fur out 2 inches with closed-cell foam on the cellar side, add poly. Workable for 6x8 cellars where wall thickness must stay minimal.
Option B is the most common Toronto choice. The double-wall assembly with poly between is forgiving of detailing imperfection.
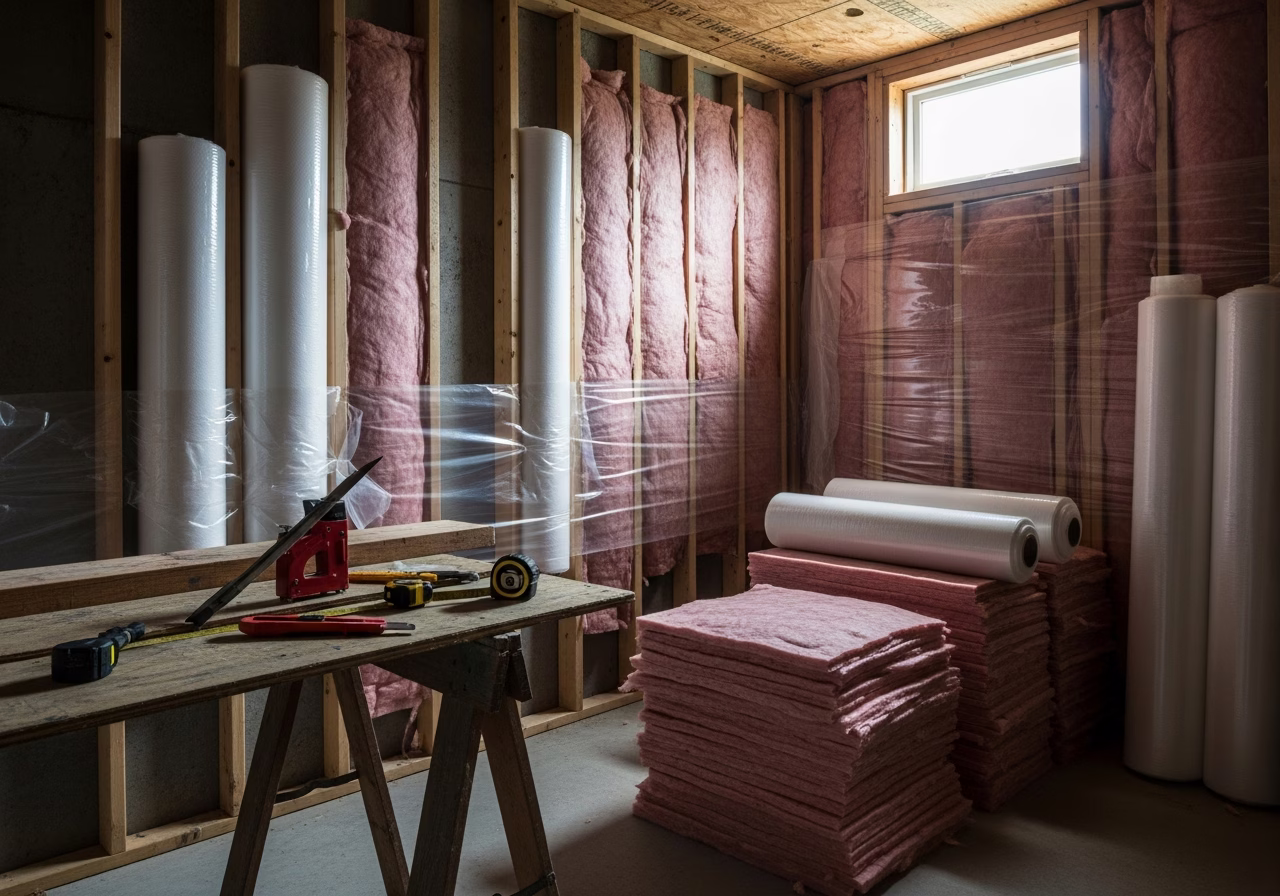
Closed-Cell Spray Foam Installation
Closed-cell foam in Toronto in 2026 is installed by certified applicators (Demilec, Polynum, Genyk) at $4–$7 per board foot, depending on thickness. For a typical 6x8 cellar:
- Walls: 320 sf at 4 inches thick = 107 board feet.
- Ceiling: 48 sf at 6 inches thick = 24 board feet.
- Total: 130 board feet, $520–$910 in foam materials, plus labor.
- Total spray foam scope: $4,500–$7,500 in a typical Toronto cellar.
Two-day cure before drywall. ESA inspection after rough-in if electrical is in the assembly.
Common Mistakes Toronto Builders Make
- 1. Vapor barrier on the cool (cellar) side instead of the warm (basement) side. Traps moisture in the wall. 100% failure within 5 years.
- 2. Discontinuous poly with un-sealed seams. Diffusion through the gaps at full rate.
- 3. Standard fiberglass batt without poly. No vapor management; relies on the basement around the cellar staying dry, which it doesn't in summer.
- 4. Closed-cell foam too thin (under 2 inches). Doesn't achieve full vapor-retarder performance.
- 5. No floor insulation under the slab finish. Condensation under flooring.
- 6. Vapor barrier punctures from electrical or fastener overuse. Critical detailing.
- 7. No mold-resistant drywall. Standard drywall paper feeds mold even with intact vapor barrier.
- 8. Wood framing in direct contact with concrete. Wicks moisture; requires PT plate with sill gasket.
Repair: When the Vapor Barrier Has Failed
Symptoms of vapor barrier failure:
- Visible mold spots on cellar walls.
- Musty odor in cellar.
- Cooling unit running constantly (humidity escaping or excess condensation).
- Moisture stains on the warm-side basement drywall (moisture moving from cellar into basement is rare but possible).
Repair scope:
- Mild (early-stage): Strip drywall on affected wall, inspect, replace insulation and vapor barrier, re-drywall. Cost $1,500–$4,500 per wall.
- Severe (extensive mold): Strip racking, drywall, insulation, framing. Remediate mold. Rebuild assembly. Cost $8,000–$25,000.
Prevention is dramatically cheaper than repair. The $5,000 of high-quality vapor-barrier work at build time saves $20,000 of repair work in year 5.
FAQ
Can I skip the poly if I use closed-cell foam?For a residential wine cellar, no — use both for redundancy. The poly costs only $200–$500 in materials for a 6x8 cellar; the insurance against detailing imperfection is worth it.
Is "smart vapor retarder" (variable-perm membrane like MemBrain) appropriate?Variable-perm membranes are for assemblies that need to dry in both directions. Wine cellars need to stay dry; a constant low-perm vapor barrier is correct.
What about the door's vapor performance?The cellar door is a vapor barrier when closed. Make sure the door has a magnetic perimeter seal and a sweep at the bottom.
My contractor wants to use Tyvek or similar housewrap. Is that OK?No. Housewrap is air-resistant but vapor-permeable — opposite of what a cellar needs. Use 6 mil poly or equivalent.
How do I check vapor barrier integrity 5 years after build?Pull a small drywall section in an inconspicuous spot (closet under racking, or back wall behind island). Inspect the poly and adjacent insulation. If both look dry and intact, the assembly is performing.
---
Specifying vapor barrier and insulation for your Toronto wine cellar? RenoHouse builds with certified spray-foam applicators and details the assembly correctly the first time. Book a free consultation on our wine cellar installation service page.
Sources & References
Authoritative sources cited in this guide:
- Ontario Building Code — OBC official text
- Toronto Building Permits — City permit portal
- Tarion New Home Warranty — Ontario new-build warranty regulator
- HCRA — Home Construction Regulatory Authority — Ontario builder/vendor licensing
Continue Reading
- How to Build a Wine Cellar in a Toronto Basement (2026 Step-by-Step)
- 12 Wine Cellar Installation Mistakes to Avoid (Toronto 2026)
- Wine Cellar Installation Toronto: Complete 2026 Cost & Design Guide


