# Attic Air Sealing Before Insulation: Why It's Non-Negotiable in Toronto 2026
Quick answer. The single most important step in any Toronto attic insulation upgrade isn't the insulation itself — it's air sealing. Insulation alone reduces conductive heat loss. Air sealing reduces convective heat loss, which can account for 30–50% of total heat loss in older Toronto homes.The single most important step in any Toronto attic insulation upgrade isn't the insulation itself — it's air sealing. Insulation alone reduces conductive heat loss. Air sealing reduces convective heat loss, which can account for 30–50% of total heat loss in older Toronto homes. Skip air sealing and you'll deliver R60 thermal performance at maybe R30 effective, and you'll create moisture problems that lead to roof rot within 7–10 years. This guide explains the physics, the practical scope, the materials, the cost, and what happens when contractors cut this corner.
For the pillar context, see Attic Insulation Toronto: Complete 2026 Upgrade Guide. For Toronto-specific moisture consequences, see Attic Insulation Condensation and Mold Prevention.
The Physics: Stack Effect in Toronto Homes
Stack effect is the buoyancy-driven movement of air through a building. In winter, warm interior air rises and exits through any leak in the upper envelope (mainly the attic floor and ceiling). Cold air enters through lower envelope leaks (basement, ground floor, around doors).
In a typical 1960s Toronto bungalow:
- Indoor temperature: 22°C
- Outdoor temperature: -10°C in January
- Pressure differential at attic floor: ~5–8 Pa
- Air leakage through attic floor (un-sealed): 0.5–1.5 ACH50 worth
That continuous warm air flow does three things:
- 1. Wastes energy. Each cubic meter of warm air that escapes is replaced by a cubic meter of cold outdoor air. This is "infiltration heat loss" and it's not improved by adding more insulation — only by sealing the leak.
- 2. Carries moisture into the attic. Indoor air at 22°C/40% RH carries ~7 g/m³ of water vapor. When that air hits the cold roof deck, it condenses. Over a winter, even modest air leakage deposits liters of water on the roof deck.
- 3. Bypasses insulation. Warm air leaks around the insulation through gaps at top plates, plumbing stacks, and electrical penetrations — it doesn't travel through the insulation, so the insulation's R-value is irrelevant to that portion of heat loss.
Air sealing addresses all three.
The Most Common Toronto Attic Air Leaks
In order of typical leakage volume:
- 1. Top plates of interior walls. Where interior partition walls meet the ceiling drywall, there's typically a 1/4" gap that leaks straight into the attic. In a typical 1,500 sqft home, top plates contribute 30–40% of total attic air leakage.
- 2. Plumbing stacks. 3"–4" PVC vent pipes that pass through the attic floor often have 1/2"+ gaps around them. Each plumbing stack leaks more than several top plates.
- 3. Bathroom fan housings. Most bathroom fans are mounted directly into the ceiling drywall with foam-tape gaskets that fail within 5 years. The fan housing then leaks both warm air and (when running) moist air directly into the attic.
- 4. Recessed pot lights. Non-IC-rated recessed lights have intentional vent slots in the housing for heat dissipation. Each one leaks significant air. A home with 12 pot lights can leak as much through them as through all the top plates combined.
- 5. Attic hatch. Pull-down hatches without proper weatherstripping leak heavily, especially when the spring tension is fading.
- 6. Wiring penetrations. Each electrical box that penetrates the ceiling has a 1/8"–1/4" gap around the cable.
- 7. Chimney chase. If the home has a brick chimney passing through the attic, the framing around it often has a 1"+ gap that leaks heavily.
- 8. HVAC duct penetrations. Where supply or return ducts pass through the attic floor, gaps around them leak.
- 9. Drop ceilings and soffited cabinets. Bulkheads above kitchen cabinets often have unfinished cavities open to the attic.
- 10. Knee walls (in 1.5-storey homes). The transition from main ceiling to knee wall is often a major leak path.
Air Sealing Materials
Different leak types require different sealants:
| Leak Type | Sealant | Notes |
|---|---|---|
| Top plates (gaps <1/2") | Acoustic sealant or canned foam | Low expansion |
| Plumbing stacks | Canned foam (low expansion) | Foam-Pro, GreatStuff |
| Bathroom fan housing | Mastic + foam tape | Replace foam tape gasket |
| Pot lights (non-IC) | IC-rated cover (Tenmat or DCI) | Code-required |
| Pot lights (IC, NEW IC-AT type) | Caulk perimeter | If new IC-AT, no cover needed |
| Attic hatch | Weatherstripping + insulated cover | Foam tape + R30+ rigid foam |
| Wiring penetrations | Acoustic sealant or fire-rated caulk | Fire-rated where required by code |
| Chimney chase | Sheet metal + fire-rated caulk | Code-required for masonry chimneys |
| HVAC ducts | Mastic | Tape fails; mastic lasts |
| Drop ceilings | Plastic sheeting + acoustic sealant | Cap the bulkhead |
The Air Sealing Process: What Good Looks Like
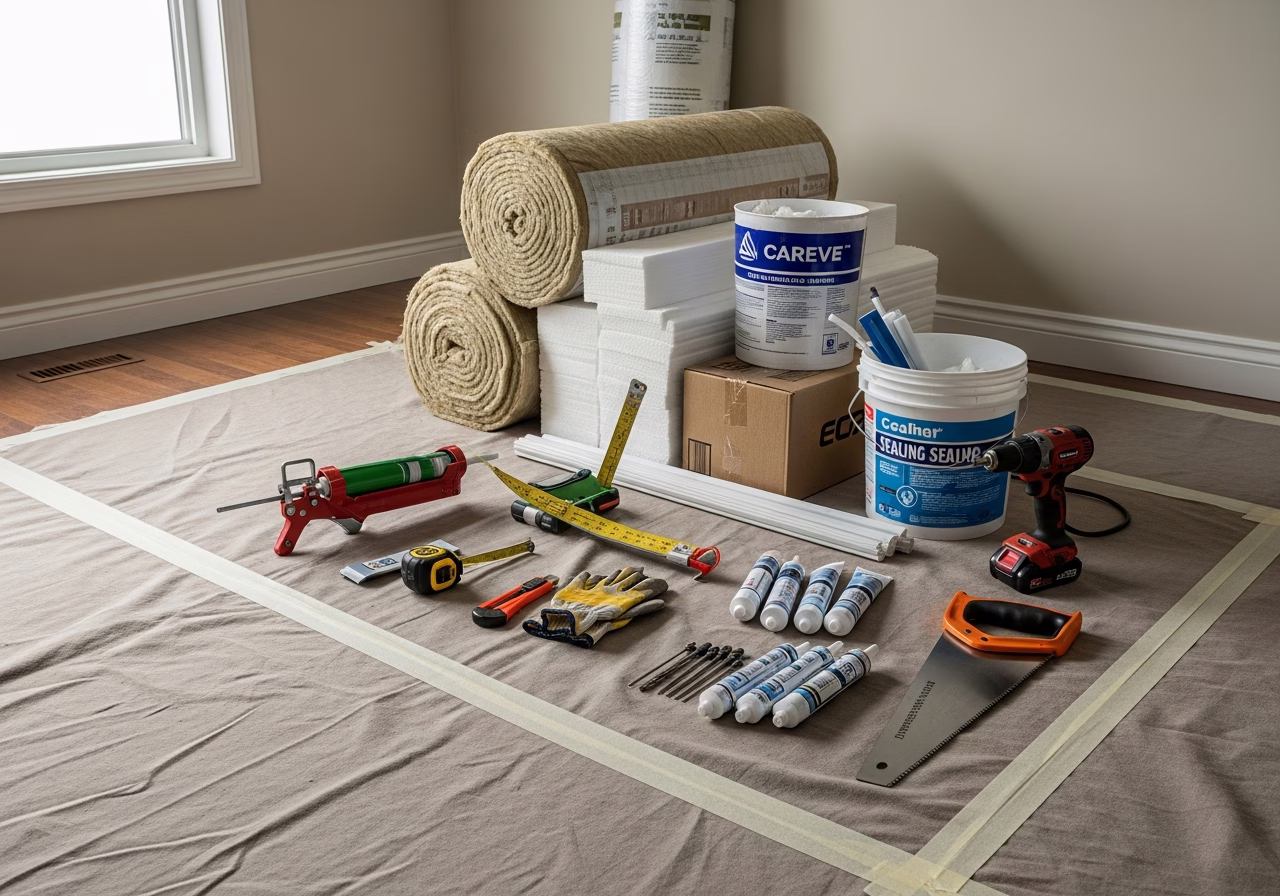
A proper Toronto attic air sealing job for a 1,500 sqft attic takes 4–6 hours and uses:
- 4–6 cans of low-expansion canned foam ($5–$7 each)
- 2–3 tubes of acoustic sealant ($10–$15 each)
- 6–12 IC pot light covers ($25–$45 each, if needed)
- Aluminum sheet metal for chimney chase ($30–$50)
- Fire-rated caulk for chimney chase ($20–$30)
- 1 attic hatch weatherstripping kit ($30–$50)
Total materials: $300–$600. Labor (4–6 hours of skilled work): $400–$600. Combined air sealing line item: $700–$1,200 for a typical Toronto attic.
The crew should:
- 1. Move existing insulation away from each penetration to expose it.
- 2. Photograph each leak before sealing (for documentation/rebates).
- 3. Apply appropriate sealant based on leak type.
- 4. Photograph each leak after sealing.
- 5. Replace insulation (or wait if doing full removal).
- 6. Verify with smoke pencil or blower door if possible.
Why Many Toronto Contractors Skip It
Air sealing is invisible to homeowners. Once the new insulation is blown over it, you can't tell whether the contractor sealed every penetration or none of them. Three reasons contractors cut this corner:
Need professional exterior renovation?
Call RenoHouse at 289-212-2345 or get a free estimate today.
Get Free Estimate →- 1. It takes 4–6 hours of skilled labor. Slipping it adds margin.
- 2. It's hot, dirty work in a confined space. Less-experienced installers prefer to skip.
- 3. Homeowners don't ask about it specifically. They ask about R-value, not air leakage.
The result: a 1,500 sqft Toronto attic insulated to R60 nominal but with 1+ ACH50 of attic-floor air leakage performs at roughly R30–R35 effective.
How to Verify Air Sealing Was Done
Five ways to confirm:
- 1. Photo report. Pre/post photos of each penetration. A reputable contractor provides 30–60 photos for a typical attic.
- 2. Blower door test. Energy Advisor pre/post (if pursuing Greener Homes) measures total air leakage. Air sealing should reduce by at least 0.5 ACH50.
- 3. Infrared scan. Done in winter shortly after install, will show cold spots at any unsealed penetration.
- 4. Smoke pencil test. Check around recessed lights, fan housings, and other suspected leak points before insulation goes in.
- 5. Weighted material list. The contractor's invoice should show realistic foam/caulk/cover counts. A 1,500 sqft attic with 12 pot lights and 4 bathroom fans should have at least 12 IC covers, 6 cans of foam, 3 tubes of caulk on the invoice.
What Happens When Air Sealing Is Skipped
Year 1: Insulation looks great. Energy bills drop ~30% (vs 50% with sealing). Homeowner thinks job was successful.
Year 2: Stack effect continues to drive moist interior air into attic. Roof deck shows first condensation stains on cold side of insulation.
Year 3–5: Visible mold begins on roof deck plywood, especially at gable ends and around vents. Rodent activity increases (warm air leaks attract pests).
Year 5–7: Roof deck plywood softens at edges. Drips show during heavy rain. Insulation around leaks gets compressed and waterlogged, losing R-value.
Year 7–10: Major roof deck repair required. Often during a roof replacement, the homeowner discovers the rot pattern and learns it was caused by skipped air sealing. Cost: $3,000–$8,000 to repair the roof deck plus the cost of removing the insulation, redoing air sealing, and re-insulating.
Avoiding all of this is why air sealing is non-negotiable.
Air Sealing for Specific Toronto Home Types
1920s–1950s East York/Beaches detached: Often has knob-and-tube wiring, multiple chimneys, complex framing. Air sealing budget: $900–$1,400. Special attention to chimney chases and old plumbing stacks. 1960s–1980s Leaside/High Park bungalow or two-storey: Standard truss construction, 4–8 pot lights, 1 bathroom fan, 1 chimney. Air sealing budget: $700–$1,000. 1990s–2010s North York/Etobicoke modern detached: More pot lights (often 12–20 in a home), better existing barrier, simpler framing. Air sealing budget: $700–$1,000 with most cost going to pot light covers. 2010s+ Toronto townhome or semi: Often relatively well-sealed already. Air sealing budget: $400–$700. 1.5-storey East York or Riverdale (storey-and-a-half): Knee walls, sloped ceilings, complex transitions. Air sealing is critical and budget should be $1,200–$1,800.Air Sealing Standalone vs With Insulation
If your home has good insulation (R40+) but bad air sealing, standalone air sealing pays back faster than insulation. A $1,200 air sealing project saving $250/year has a 4.8-year payback — better than most insulation upgrades.
But standalone air sealing requires moving existing insulation aside to access penetrations. Most homeowners do air sealing as part of insulation upgrade because the insulation is already disturbed.
Air Sealing and Pot Lights
Pot lights (recessed can lights) are the air sealing item homeowners think about most often, and they're worth a section.
Three pot light types in Toronto:
- 1. Non-IC. Old-style. Vents heat into the attic by design. Cannot be buried in insulation. Requires IC-rated cover (Tenmat FF130 or DCI).
- 2. IC. Insulation-Contact rated. Sealed for thermal contact with insulation but not always air-tight.
- 3. IC-AT. Insulation-Contact-Airtight rated. Modern code-compliant option. No cover needed; just caulk the perimeter trim ring.
For older Toronto homes with non-IC pot lights, IC covers are non-negotiable. Cost: $25–$45 each, plus 15 minutes of installation per cover.
For full pot light strategy, see Pot Light Baffles and Attic Insulation: Why They Matter.
Bottom Line on Air Sealing
Air sealing is not optional for Toronto attic insulation upgrades. It's responsible for 50%+ of the achievable performance improvement. Insulation without air sealing is wasted material.
Specify air sealing explicitly in your scope of work. Verify with photo documentation. If pursuing rebates, the Energy Advisor blower door test will catch under-sealing.
Budget $700–$1,400 for comprehensive attic air sealing in a typical Toronto home. It's the highest-ROI line item in the entire upgrade scope.
---
Planning your Toronto attic upgrade and want to ensure air sealing is done right? RenoHouse provides photo-documented air sealing on every project, with blower door verification when paired with rebate paperwork. Visit our attic insulation upgrade service page or start with an insulation thermal audit to identify your home's specific leak patterns.
Sources & References
Authoritative sources cited in this guide:
- Canada Greener Homes Initiative — Federal retrofit programs
- ENERGY STAR Canada — Canadian ENERGY STAR specs
- Ontario Building Code SB-12 — OBC energy efficiency supplementary standard
- Toronto HELP — Home Energy Loan — Toronto Home Energy Loan Program
Continue Reading