# Composite Decking Mistakes Toronto Homeowners Make in 2026
Quick answer. We have remediated 40+ composite deck installs in the GTA over the last decade where the original install missed something critical — and the homeowner paid double, once for the failed install and once for the fix.We have remediated 40+ composite deck installs in the GTA over the last decade where the original install missed something critical — and the homeowner paid double, once for the failed install and once for the fix. Composite decking is more forgiving than wood in terms of weather, but less forgiving in terms of installation precision: the wrong fastener, the wrong gap, the wrong joist setup, and your 25-year warranty becomes a 5-year headache.
This is the catalog of every mistake we have seen, what causes it, and how to avoid it. For the broader composite guide, see composite decking Toronto 2026. For the install procedure, see how to install composite decking Toronto.
Mistake 1: Skipping Joist Tape
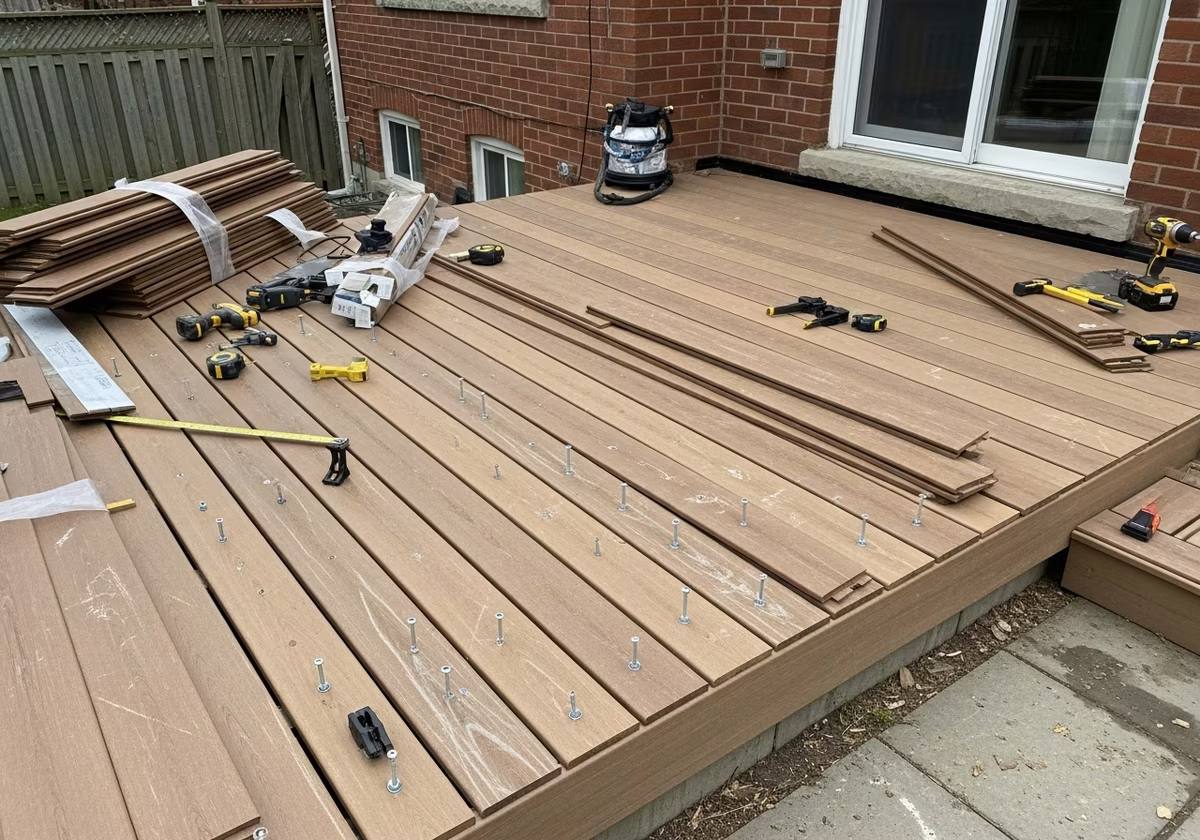
The mistake. Installing composite boards directly on bare PT joists without butyl flashing tape on top of each joist. Why it happens. Joist tape costs $250–$400 on a 300 sq ft deck. Some contractors quote tighter and skip it, or homeowners DIY without knowing it exists. The damage. Every deck screw penetrates the joist top. Each penetration is a moisture entry path. Without joist tape, joist tops rot 5–8 years before the rest of the joist. Visible black staining around fasteners. Boards near rotting joist tops sag or develop springiness. The fix. Strip surface boards, apply joist tape, reinstall surface. Cost: $4K–$8K depending on deck size. Prevention. Always insist on Trex Protect, Cofair Quickflash, or Grace Vycor Deck Protector joist tape. Specified in your contract. Photographed during install.Mistake 2: Wrong Fasteners
Mistake 3: Tight End Gaps
The mistake. Installing boards with butt joints touching or with sub-mm gap. Why it happens. Looks "cleaner" to install boards tight. Some installers in summer heat (when boards are at maximum length) don't realize they shrink — wait, actually they expand further on hotter days. Always plan for the heat-direction expansion. The damage. First 32°C+ summer day, boards expand and have nowhere to go. They buckle upward (creating trip hazards) or push outward against picture frame (causing edge separation). The fix. Cut buckled boards down to size and reinstall with proper gap. Significant labor; typically $1,500–$4,000 to fix on a 300 sq ft deck. Prevention. Specify gap based on install temperature:- Below 5°C: 6mm minimum.
- 5–15°C: 4–5mm.
- 15–25°C: 3–4mm.
- Above 25°C: 2–3mm minimum.
Use spacer keys or shims at every butt joint during install.
Need professional exterior renovation?
Call RenoHouse at 289-212-2345 or get a free estimate today.
Get Free Estimate →Mistake 4: Mixed Batches
Mistake 5: Reusing Rotten Joists
The mistake. Installing new composite on existing joists with visible rot, especially at the ledger or rim joist. Why it happens. Re-decking on existing structure saves money. Pressure to keep budget under $20K. Homeowner doesn't want full demo cost. The damage. Rot continues under new boards. Eventually causes board sag, dangerous springiness, and structural failure. Warranty denied. Insurance can also flag "improper substructure." The fix. Demo new composite boards, replace rotten joists, reinstall. Ironically more expensive than full demo + new build. Prevention. Probe every joist with awl during inspection. Sister or replace any soft joist. Replace ledger if rot at house attachment. Don't compromise; rotten structure under new composite is a hidden disaster waiting.Mistake 6: Wrong Joist Spacing
Mistake 7: Picking Color in Store Lighting
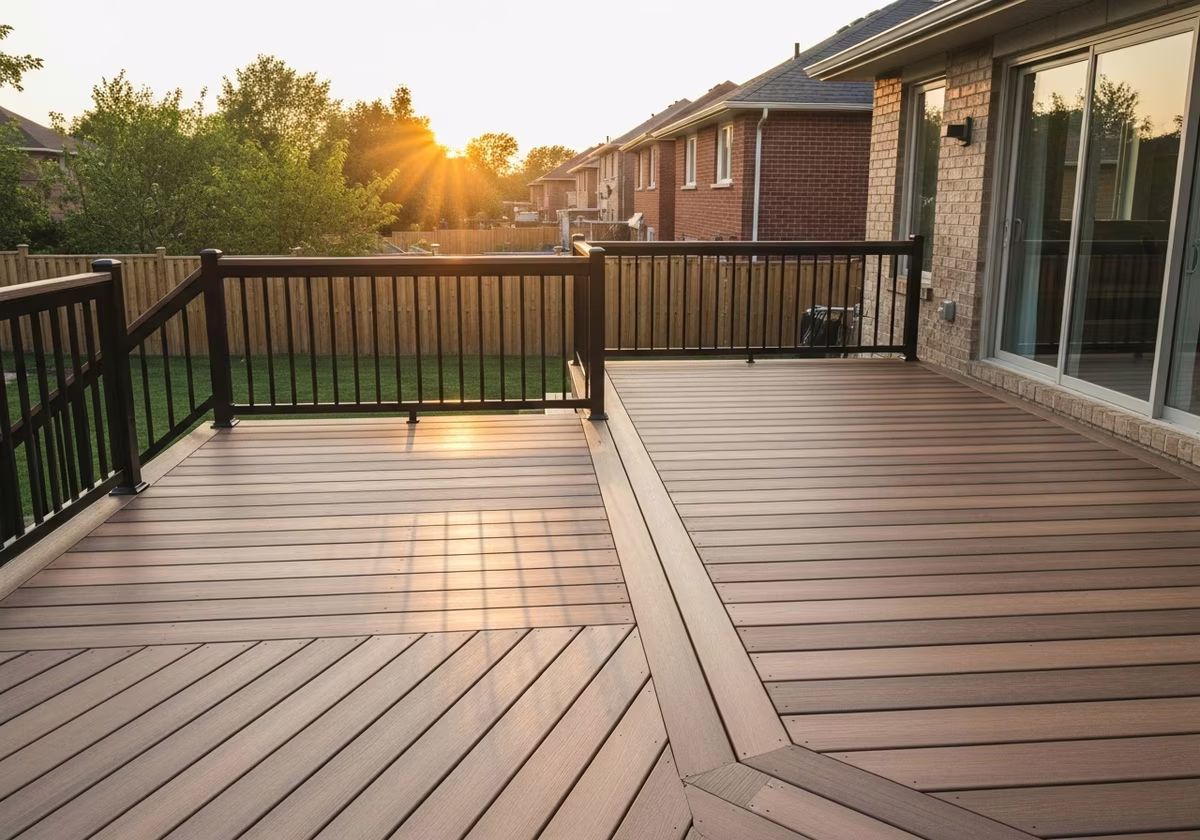
The mistake. Choosing board color from a Home Depot fluorescent-lit aisle without seeing the actual outdoor sample. Why it happens. Home Depot store visit is the first composite touchpoint for many homeowners. Big sample boards under fluorescent. Looks great in store, totally different in home backyard sun. The damage. Color regret. Spiced Rum reads orange in some afternoon light; Coastline reads green-tinted next to certain home cladding; Toasted Sand reads pink in low-angle morning sun. The fix. Live with it (composite doesn't fade — what you install is what you have for 25+ years), or replace 100% of boards ($15K+). Prevention. Get physical sample boards. Lay them on your existing deck or backyard ground. View at three times of day (morning, midday, evening) plus wet (water rinse) and dry. Take photos. Compare against home cladding/trim color in actual photos.Mistake 8: Skipping the Picture Frame on a Premium Deck
The mistake. Installing field boards directly to the perimeter without a picture frame border. Why it happens. Saves $800–$1,800. Customer doesn't realize the visual upgrade. The damage. Deck reads incomplete and budget. ROI hit at resale. The fix. Add picture frame retroactively. Difficult — often requires demoing perimeter row of field boards. $2,500–$5,000. Prevention. Include picture frame on any deck above $20K total budget. The visual upgrade is significant; the cost premium is small relative to total project.Mistake 9: Heat Mismatch in Dark Colors
The mistake. Choosing Trex Lava Rock or AZEK English Walnut without HeatShield technology or PVC formulation. Why it happens. Customer wants the dramatic dark deck. Salesperson doesn't emphasize heat issue. The damage. Surface temperature reaches 64–68°C in Toronto July afternoon. Kids cry, dogs refuse, deck unusable mid-day for barefoot or paw-pad use. The fix. Replace surface with HeatShield (Trex Transcend Lineage) or PVC equivalent. Material cost only — but $5K–$10K. Prevention. If choosing dark color and barefoot/paw-pad use matters, mandate Trex Transcend HeatShield, AZEK Vintage/Arbor PVC, or TimberTech AZEK PVC. Dark colors in standard composite get hot.Mistake 10: No Brand Registration
The mistake. Installing the deck and never registering with the brand for warranty. Why it happens. Homeowner doesn't know registration exists. Contractor doesn't handle it. The "register your deck" card from the box gets thrown out. The damage. When a defect appears at year 8, 12, 18, you can't easily prove install date or product line. Brand can deny claim. The fix. Try to register late — some brands accept with original purchase invoice and install photos, others don't. Prevention. Brand-certified installers (Trex Pro, TimberTech Registered, Fiberon Mastercraft) handle registration as standard practice. Confirm in writing. Get the registration confirmation number for your records.Mistake 11: Improper Cleaning (Voids Warranty)
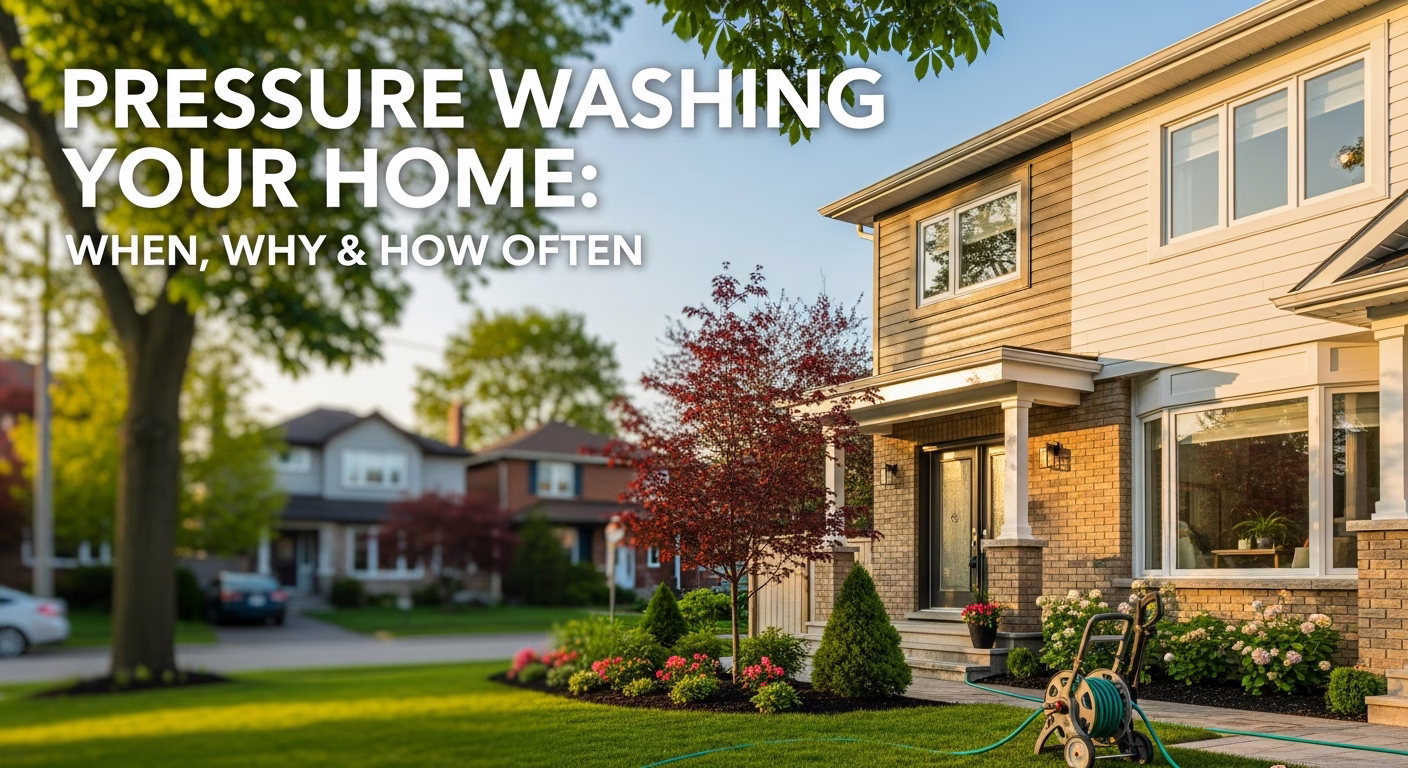
The mistake. Pressure washing above 1500 PSI, scrubbing with abrasive cleaners, using bleach above 5%, or applying paint/stain. Why it happens. Habit from wood deck care. "Power wash" assumed to apply to composite. Stains assumed to need bleaching off. The damage. Etched cap surface, color shift, surface stripping. Warranty denied for "improper care." The fix. No fix for cap damage from pressure-wash etching. The pattern stays. Prevention. Garden hose rinse + Dawn-style mild soap + soft brush. That's it. Pressure washer max 1500 PSI from 12"+ distance. No bleach, no scrubbing pads, no acetone.Mistake 12: Stair Tread Hidden Fasteners
The mistake. Using hidden fastener clips for stair treads (instead of face-fastening). Why it happens. Wanting consistent visual with field boards. The damage. Stair treads can lift slightly in winter freeze-thaw — major fall hazard. Brand-spec install ALWAYS face-fastens stair treads with stainless screws and color-matched plugs. The fix. Re-fasten stair treads with face screws. $400–$800. Prevention. Always face-fasten stairs. Brand spec.Mistake 13: No End-Grain Sealer (WPC Only)
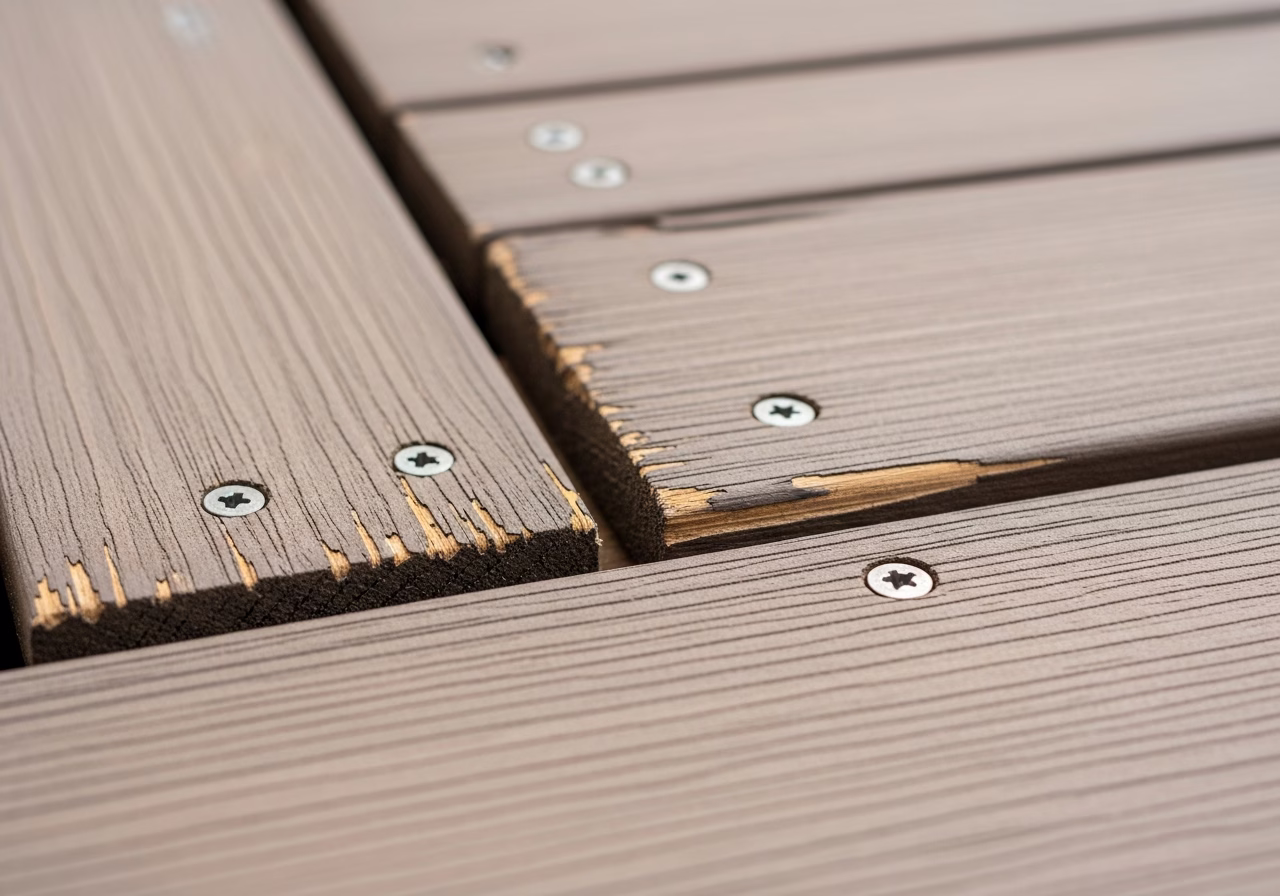
The mistake. Cutting wood-plastic composite boards to length and not sealing the cut end exposing wood fibre. Why it happens. PVC doesn't need this; some installers apply same logic to WPC. They don't. The damage. Wood fibre at cut ends absorbs moisture, expands, cracks the cap. Visible bleeding/staining at deck edges within 3–5 years. The fix. Replace affected end boards. Material + labor. Prevention. Apply end-grain sealer (composite-compatible — Trex sells one, Fiberon and TimberTech recommend equivalent) to all freshly cut WPC composite ends. PVC composite (AZEK) does not need this — pure PVC has no wood fibre.Mistake 14: Mismatched Brand Clip and Board
The mistake. Using Trex Hideaway clips on TimberTech boards (or vice versa). Or generic clips on brand-name boards. Why it happens. Cost-cutting. Lots of clip systems look similar. The damage. Groove dimensions vary slightly between brands. Mismatched clips may not seat fully, causing edge gap loss, board flex, or pop-outs. Warranty denied. The fix. Re-do hidden fastener system with brand-matched clips. Material plus labor — typically requires demoing surface. Prevention. Always use brand-matched clips for the boards. Specified in contract.Mistake 15: No Joist Hanger Replacement on Re-Deck
The mistake. Reusing old galvanized joist hangers on a re-deck without inspection. Why it happens. Hangers are usually sub-deck and out of sight. The damage. Galvanized hangers from 1995–2005 era can have surface rust through. Joist support compromised. The fix. Replace hangers. Adds $200–$500 labor. Prevention. Inspect every joist hanger during demo. Replace any with rust-through, undersized, or non-load-rated. Use stainless or hot-dipped galvanized G185.Mistake 16: Forgetting Permit on Re-Deck
The mistake. Doing a re-deck (replacing surface only) without pulling a permit. Why it happens. Some Toronto inspectors allow re-decks without permit if structure is unmodified. Some require permit regardless. The damage. No inspection record for buyer at resale. Insurance gap. Some neighborhoods pull title at resale and check permit history; gap is a haggling point. The fix. Apply for "as-built" permit retroactively. Toronto allows; fee is typically 2x standard permit. Prevention. Always pull permit. Even if not strictly required for re-decks. Trivial cost ($250–$500) for major future protection.Mistake 17: Deck Surface Pitched Wrong (Or Not At All)
The mistake. Installing the deck dead level (zero pitch toward outside). Why it happens. Looks "right" to install level. Carpenters trained on indoor floors. The damage. Water ponds on the deck surface. Composite handles standing water but the ponded area attracts dirt, pollen, organic staining. Visible discoloration over years. The fix. Re-grade. Difficult — often requires partial demo. $2K–$4K. Prevention. Pitch the deck 1/8" per foot toward the outside (away from house). Imperceptible visually; significant in water shedding.Mistake 18: Lighting Wired After Install
The mistake. Install deck, then decide to add lighting, requiring drilling through cap to run wires. Why it happens. Late-stage scope creep. Customer sees neighbor's lit deck and wants the same. The damage. Cap penetrations for wire runs are leak paths. Visible drilled holes around lighting fixtures. Less clean look than integrated install. The fix. Live with it. Prevention. Decide on lighting before install. Pre-wire conduit through joist bays during build. Even if you don't install fixtures right away, the conduit is there for future addition.Mistake 19: No Fascia Wrap
The mistake. Leaving rim joist exposed without composite fascia wrap. Why it happens. Saves $500–$1,100. Some homeowners don't realize fascia is a thing. The damage. Raw PT lumber visible at deck perimeter. Reads "unfinished" and budget. ROI hit at resale. The fix. Add fascia retroactively. Material + day of labor. Prevention. Always include fascia in scope. Cheap visual upgrade.Mistake 20: Hot Tub or Pool Equipment Without Pad
The mistake. Setting hot tub directly on composite deck surface without rubber or composite pad under feet. Why it happens. Installation rushed. Customer wants hot tub same day as deck. The damage. Hot tub feet (typically rubber or plastic) compress the cap or stain it. Some composite shows footprint discoloration. Pool equipment chemicals can spot. The fix. Move tub, replace stained boards. Material + labor. Prevention. Use rubber or composite pads (1/2" thick minimum) under hot tub feet. Place pool chemical containers in stand-off trays.Quick Self-Check After Install
Walk your new composite deck and verify:
- 1. Joist tape visible on every joist top before boards installed (you should have photos).
- 2. End gaps at every butt joint (slip a 4mm spacer in to verify).
- 3. Picture frame border (if you specified it).
- 4. Stainless screws specified in contract — visible in photo records.
- 5. Brand registration confirmation number filed.
- 6. Fascia installed on all exposed perimeters.
- 7. Deck pitched away from house (test with marble; should slowly roll outward).
- 8. Hidden fastener clips brand-matched to boards.
- 9. Stair treads face-fastened with color-matched plugs.
- 10. End-grain sealer on cut WPC board ends.
If any of these are missing, raise with contractor before final payment. Most are easier to fix in the days after install than years later.
For installation procedure step-by-step, see how to install composite decking Toronto. For warranty implications when mistakes happen, see composite decking warranty comparison 2026.
---
Already had a composite deck installed and worried about hidden mistakes? RenoHouse offers composite deck inspection services — we evaluate your install for the 20 mistakes above and provide a written report with photo documentation. Book on our composite decking upgrade service page.
Sources & References
Authoritative sources cited in this guide:
- Toronto Building Permits — Permit info
- Ontario Building Code 9.27 (Cladding) — Exterior cladding standards
- NRC Building Codes — National building codes
Continue Reading
- How to Install Composite Decking in Toronto: Step-by-Step 2026
- Composite Decking Colors Toronto 2026: Trends & Selection Guide
- Composite Decking Toronto: Complete 2026 Cost & Brand Guide