# How a Stretch Ceiling Is Installed: Step-by-Step (Toronto, 2026)
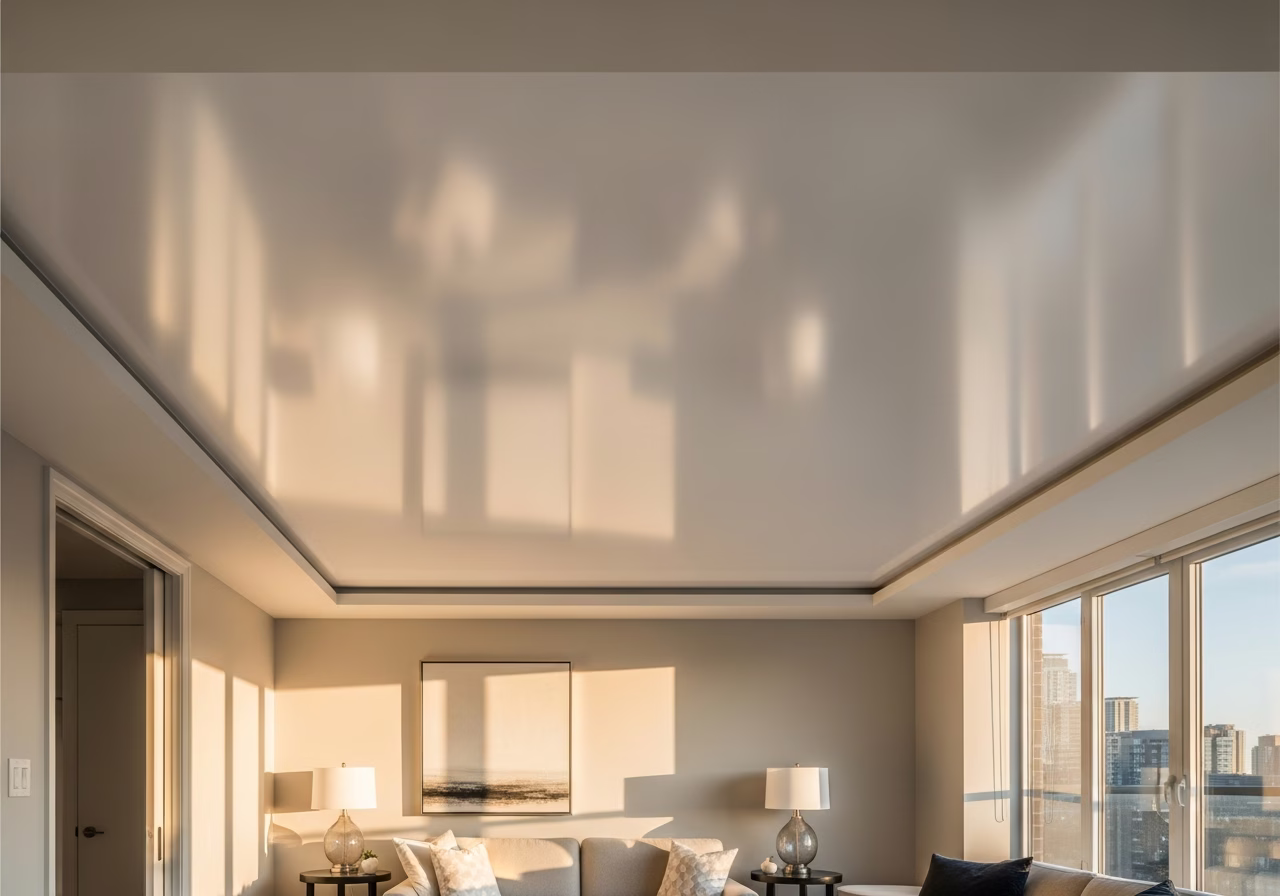
Quick answer. A typical Toronto PVC stretch ceiling install follows ten steps over two visits — a 30-minute laser measurement, then a 2.5–3.5 hour install day where the room is heated to 60–70 °C, the factory-cut film is stretched into a perimeter aluminum track, and fixtures are cut around with heat-melted rings. No drywall dust, no demolition, your existing ceiling stays in place above.If you've never seen one go in, the install can look like quiet magic — folded plastic comes out of a box, a heater runs for 40 minutes, and an hour later there's a perfectly flat, mirror-glossy ceiling above your head. This guide breaks down every step so you know what's happening.
For the broader owner's manual, see our stretch ceiling installation & care pillar. For the cold-stretch fabric alternative, see heat-gun vs cold install. For the timeline question specifically, see the 2–3 hour install reality.
The Two-Visit Model
Almost every reputable Toronto installer works in two visits, separated by 2 to 5 business days.
Visit 1 — Site measurement (30 minutes, free). A technician arrives with a Leica or Bosch laser distance meter, measures every wall length, checks the diagonals to confirm the room is square (it usually isn't — most Toronto rooms are out by 5–25 mm), photographs every fixture, and records the exact ceiling drop position. The measurements are sent to the cutting facility — usually Laqfoil's Toronto factory or AV Style's North York shop — where the membrane is cut to the room's true shape and the harpoon edge is welded around the perimeter. Visit 2 — Install day (2.5–3.5 hours per room, fixed price). The factory-cut membrane arrives in a folded box. The crew has the room ready in 15 minutes, hung in 90, finished in another 30.Step 1: Floor & Furniture Protection (15 min)
Crew arrives with:
- Drop cloths (canvas, not plastic — plastic is slippery underfoot when the heater runs).
- Furniture sliders to centre-stack movable items.
- Painter's tape (3M Blue) for wall masking at the planned profile line.
- A small folded ladder and one full-height step ladder.
Furniture moves to the centre of the room and gets covered. Anything fragile (glass, ceramic) goes out. Wall art on the perimeter walls comes down. Anything within 30 cm of the ceiling gets wrapped — no exceptions, because the heater warms everything in the room.
Step 2: Marking the Drop Line (10 min)
The installer decides where the new ceiling sits. This is the drop — the distance below the existing ceiling where the membrane will be tensioned.
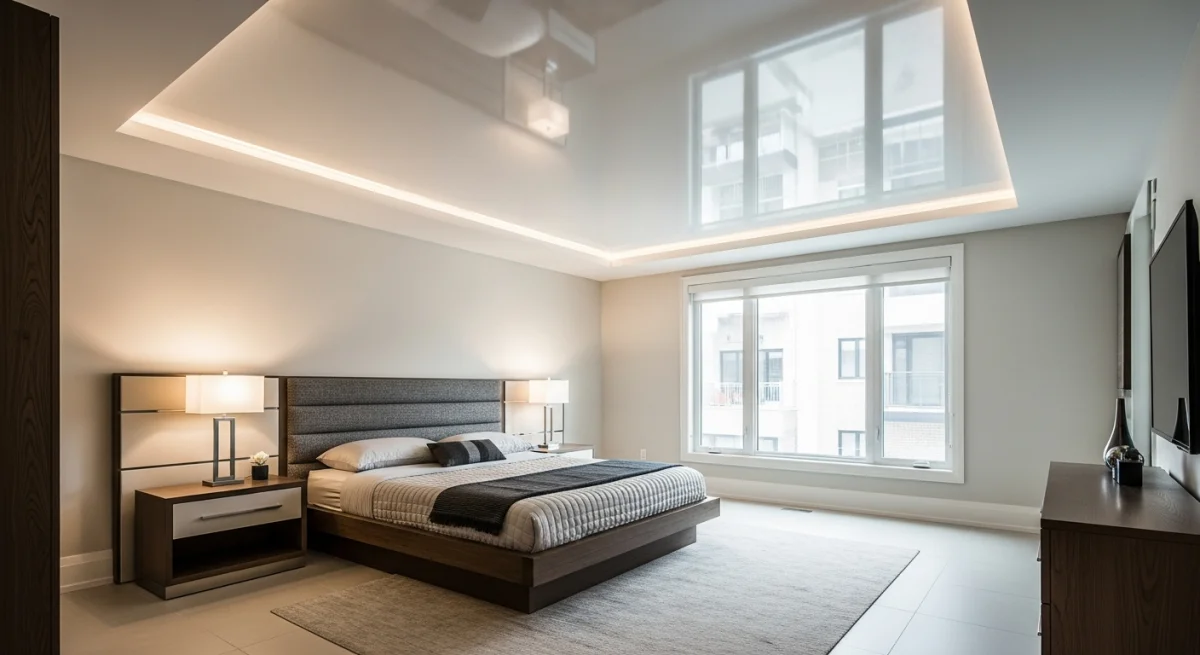
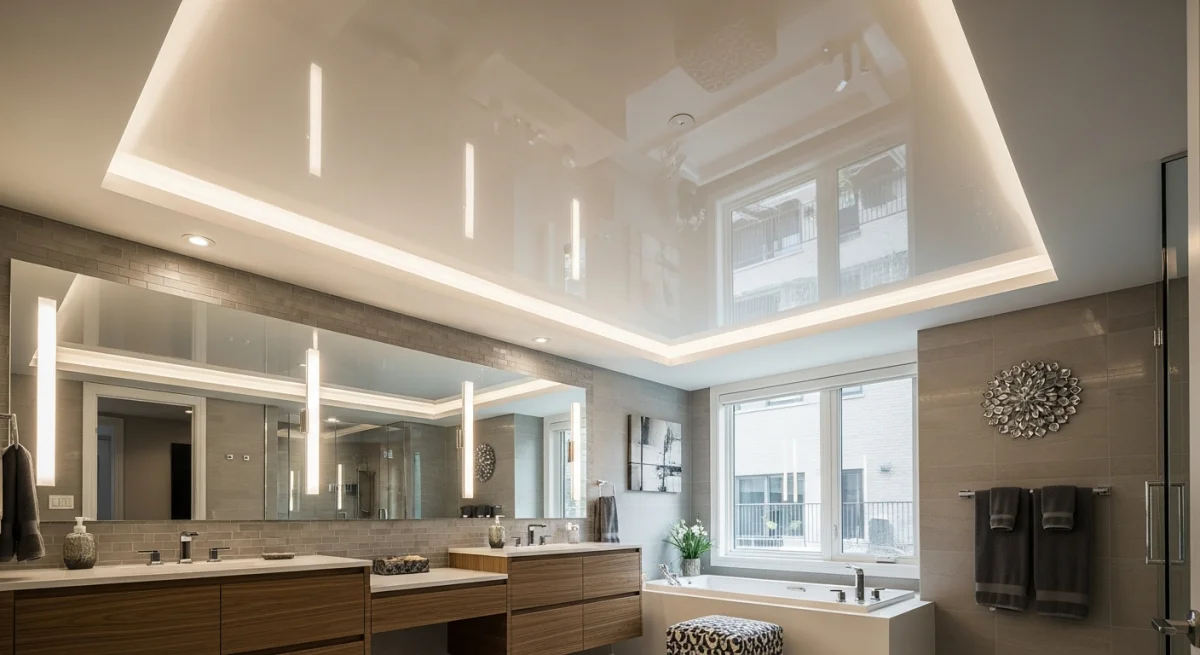
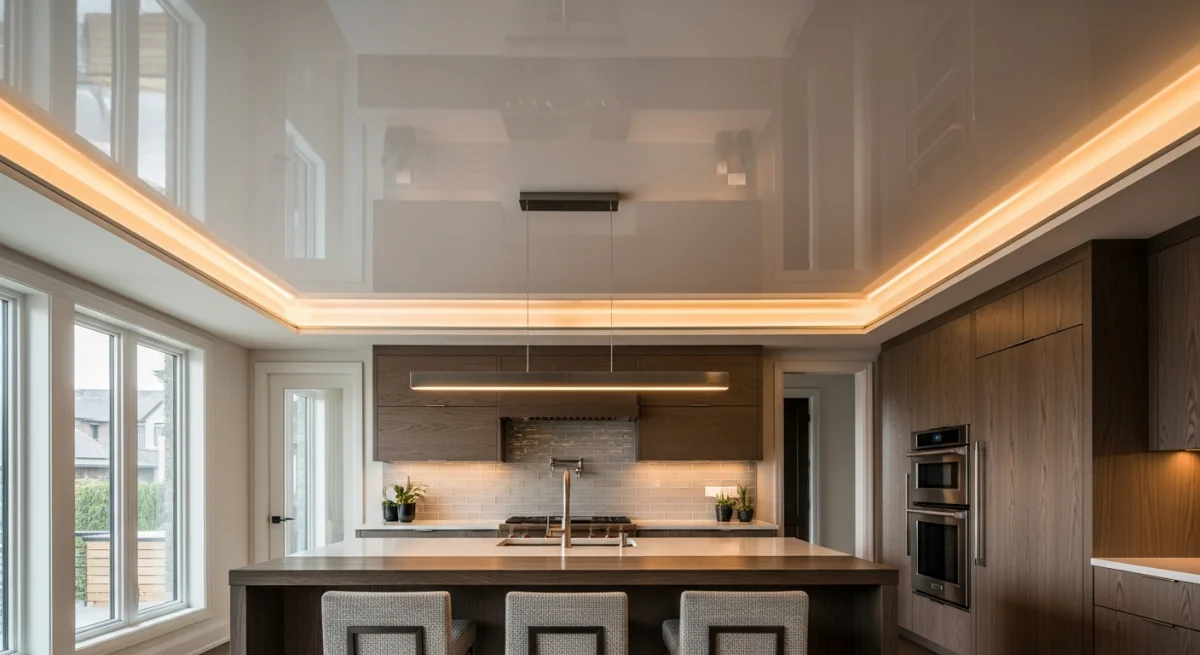
Standard drops:- 25–35 mm — minimum, for ceilings already at 8 ft (Toronto condos). Saves headroom.
- 40–60 mm — for cove lighting (you need depth for the LED strip plus shadow gap).
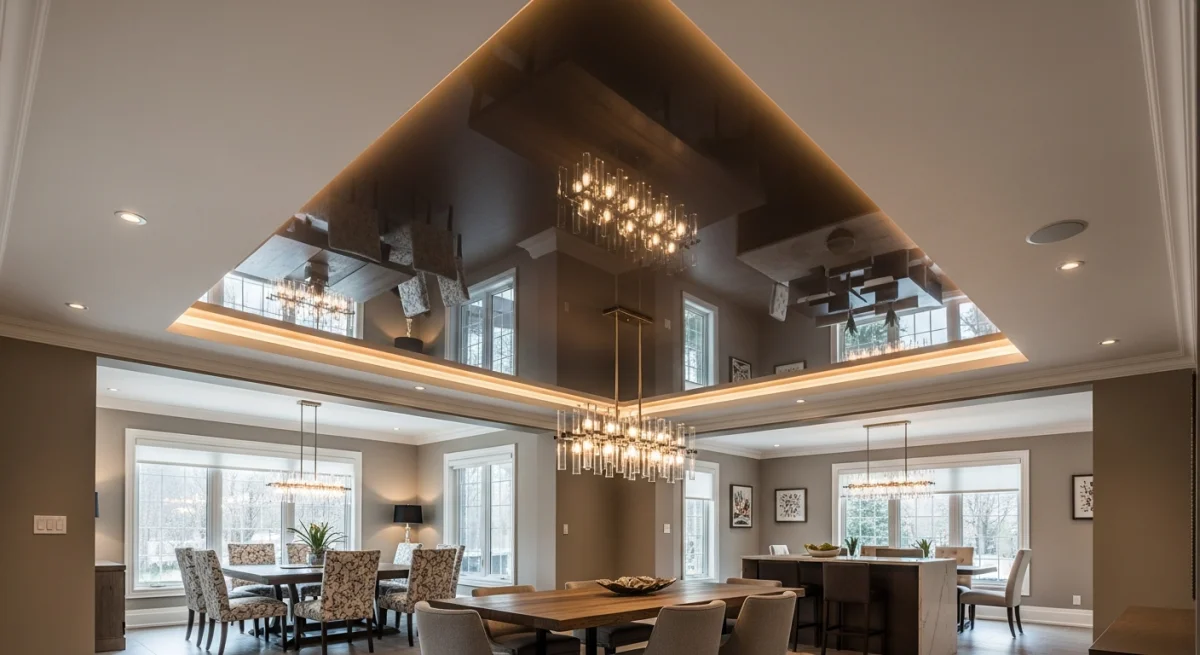
- 80–150 mm — for backlit translucent ceilings (LED panel needs plenum depth above the membrane).
- 200+ mm — for multi-level designs with framed sub-coffers.
A laser line-level (Bosch GLL3-80, Hilti PM 30-MG, or similar) is set on a tripod and projects a perfectly horizontal line around the room. The installer ticks the line every 600 mm with a pencil. This is the bottom edge of where the profile will mount.
Step 3: Mounting the Profile (30–45 min)
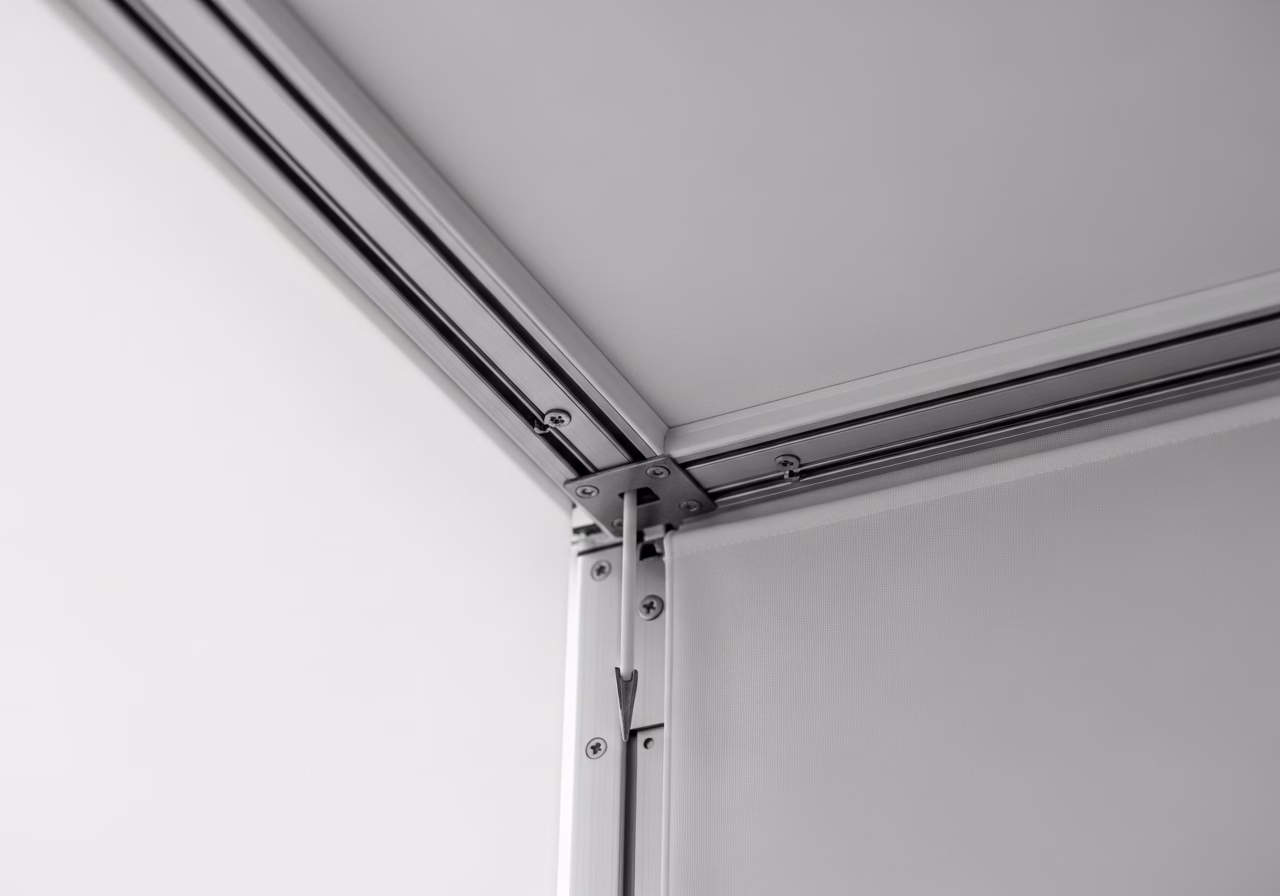
The aluminum harpoon profile (or PVC profile on budget jobs — see aluminum vs PVC profile) is cut to length with a chop saw or aluminum-rated hand miter, mitered at corners (45° on outside corners, butt-jointed at inside corners), and screwed to the wall.
Anchors used:- Drywall walls into wood studs — #8 × 1¼" wood screws every 150 mm.
- Drywall walls into nothing — Hilti or Tapcon plastic anchors every 150 mm. Avoid butterfly toggles (they stress the drywall and pull through under tension).
- Concrete walls (condo) — Tapcon 3/16" × 1¾" or Hilti HUS-EZ every 200 mm. Pre-drilled with a 5/32" carbide bit.
- Existing tile (rare, bathroom retrofits) — diamond bit pre-drill, Tapcon-into-substrate.
The profile is mounted dead level to the drop line. If a wall is bowed, the profile is shimmed flat — a bowed profile telegraphs through the membrane and is impossible to fix later.
Step 4: Fixture Prep (20–30 min)
Every existing fixture in the ceiling — pot lights, smoke alarms, sprinkler heads, ceiling fans, HVAC diffusers, in-ceiling speakers — needs a plan.
Need professional renovation?
Call RenoHouse at 289-212-2345 or get a free estimate today.
Get Free Estimate →- 1. Power cut at the breaker (or fixture removed entirely if the homeowner is replacing).
- 2. Wire pulled down through the existing ceiling, sleeved if it touches insulation.
- 3. A mounting platform is added in the plenum — a wood block screwed to a joist, positioned so the fixture body lands exactly where the membrane will be cut. This ensures the fixture trim sits flush against the new stretched membrane, not 25 mm above it.
- 4. Plastic reinforcement rings are pre-glued to the inside of the membrane at marked fixture positions (this happens at the factory if locations are pre-specified, or on-site if they aren't).
Step 5: Heating the Room (30–45 min)
This is the step that tells you you're watching a real PVC install. A propane gas heat gun — typically a Master B70CED, Munters MGS-50, or Bullfinch 100 — is wheeled in, a 9-kg propane bottle is connected outside (or in a ventilated area), and the heater runs.
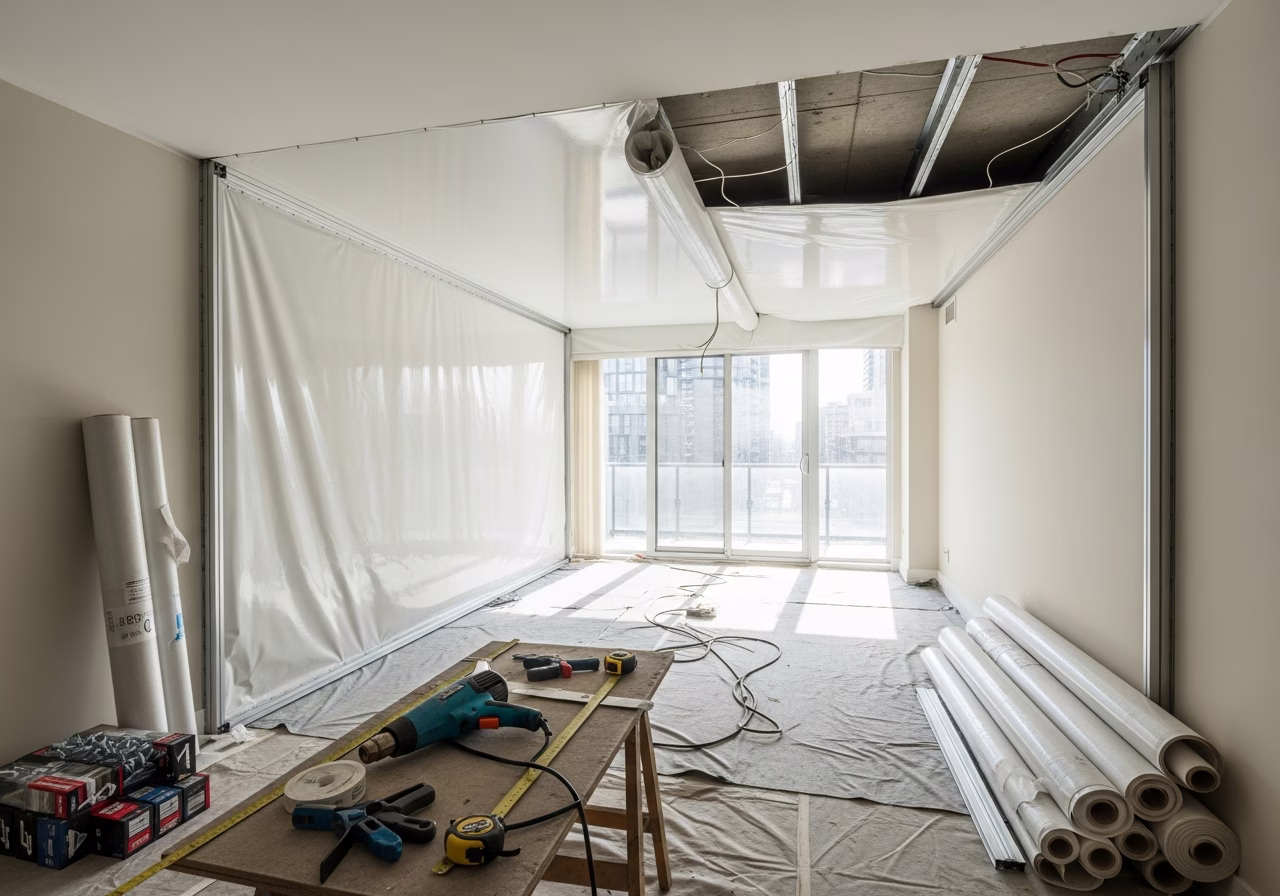
Target temperature: 50–70 °C ambient. The PVC film softens above 50 °C and stretches plastically above 60 °C. Below 50 °C it cracks; above 80 °C it permanently distorts. The installer monitors with an IR thermometer. Why no smoke alarm trigger: propane heaters of this type are direct-fired (combustion gases go into the room) but the volume of CO produced is well below alarm threshold for the install duration, and the room is vented within 5 minutes of shutdown. Some Toronto buildings ban propane on upper floors — in those cases the install uses an indirect-fired electric heater (Trotec TDS 75 or similar) which takes longer but doesn't combust anything indoors. Safety: the room is sealed (door closed, windows shut) during heating. The crew wears heat gloves and stays moving. Children, pets, and homeowners stay out until the membrane is up and the heater is off.Step 6: Hanging the Membrane (15 min)
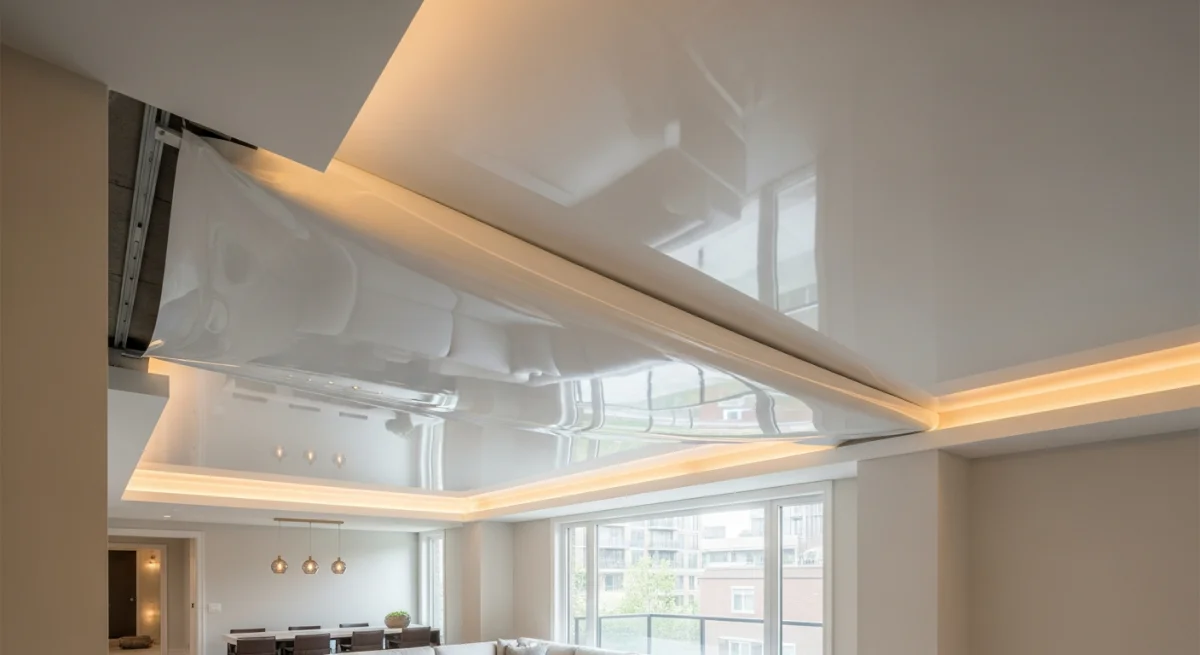
The folded membrane comes out of the box. The first corner — pre-marked at the factory — is identified and clipped into the harpoon track at one corner of the room using a Yashar curved spatula. The membrane is left to drape from that single corner.
The installer then walks to the diagonally opposite corner, holds the membrane up by hand, warms the harpoon edge with a smaller handheld heat gun (Steinel HL2020E, 600 °C tip) to relax it, and snaps that corner in.
At this point the membrane is hanging diagonally between two corners with the other two corners drooping. The room is warm; the film is soft. You can see the perimeter harpoon snake around the edge of the membrane, looking like a black or grey beaded rope.Step 7: The Stretch Sequence (45–60 min)
This is the slowest, most-skilled part of the install. The remaining two corners go in. Then the sides are stretched and hooked progressively from each corner toward the midpoint of each wall.
Tools used:- Yashar harpoon spatula (curved hook) — hooks the harpoon edge into the track groove.
- Dilov or ProFix straight spatula — finishes mid-wall sections.
- Handheld heat gun — locally re-warms the harpoon if it's cooled and gone stiff.
The installer works rhythmically: spatula in, lift, push, click. Spatula in, lift, push, click. A 200 sqft room has roughly 18 m of perimeter; one click every 60–80 mm means 220–300 clicks. A practiced two-person crew does it in 45 minutes.
When the membrane is fully hooked, the heater is shut off. The room starts cooling. As the PVC cools from 60 °C to 22 °C it shrinks by approximately 7–10% across each axis — and that shrinkage is what pulls the membrane drum-tight. By the time the room is at 30 °C (about 15 minutes), the ceiling looks finished.
Step 8: Fixture Pass-Throughs (20–40 min)
Now the fixture cut-outs. For each fixture:
- 1. The pre-glued plastic ring is located through the membrane (you can feel it from below).
- 2. The membrane is heated locally to soften the PVC inside the ring.
- 3. The membrane is cut inside the ring with a hooked utility blade — never outside, or the cut propagates.
- 4. The fixture body is lowered through the cut, mounted to the pre-installed wood block in the plenum, and trimmed.
- 5. For pot lights: the trim ring sits flush against the membrane, hiding the cut edge.
Step 9: Trim Bead (15–20 min)
A flexible plastic trim bead — colour-matched to the membrane — is inserted into the gap between the membrane edge and the wall. This is purely cosmetic; it hides the harpoon and gives a clean finish line.
Three trim profiles are common:
- L-bead — most common, simple finish.
- F-bead — wider, used when the wall isn't perfectly straight.
- Cove bead — soft curved transition for a "no edge" look.
The trim bead pushes in by hand. No tools, no glue.
Step 10: Walkthrough & Cleanup (15 min)
Heater rolled out. Floor cloths folded up. Tape removed. Furniture pushed back. The installer walks the homeowner around, checks for any micro-bubbles (rare; usually self-resolve as the membrane reaches full equilibrium over 24 hours), and signs off.
Total time on a clean 200 sqft single-room PVC install: 2.5 to 3.5 hours. You walk in afterward and there's a perfectly flat ceiling, factory-finished trim around the perimeter, and zero dust on anything in the room.
What's Different for Fabric (Cold Install)
Steps 5–7 disappear (no heating, no thermal stretch). Instead:
- Fabric is unfolded oversized (10–15 cm extra on each side).
- Wedge profile track is used instead of harpoon track.
- Fabric is tucked into the wedge channel with a plastic pusher and tensioned by hand.
- A hooked utility blade trims the excess flush against the wall.
Total time: 4–5 hours for the same 200 sqft room. Cleaner (no heater), more controllable, more expensive material.
For deeper detail on which to choose for which room: heat-gun vs cold install.
Why You Don't DIY This
Three reasons, in order of importance:
- 1. Propane in a closed room. Toronto fire code is unforgiving. Without proper combustion-air management and CO monitoring, you can hit dangerous CO levels in 15 minutes. Certified installers know the threshold; YouTube doesn't.
- 2. Factory-welded harpoon. The harpoon edge is HF-welded at the factory — you cannot replicate this on a kitchen counter. Hand-attached harpoon will pull off the film at the first temperature swing.
- 3. The Yashar spatula technique. Looks easy, takes 200+ hours of practice. A wrong angle tears the harpoon weld and you've ruined a $400 membrane.
What the homeowner should do: pick the colour, hire the installer, get out of the room during heating, and enjoy a 2-hour project.
Get a Free Site Measurement
Book a free site measurement — our installer-network partner arrives with the laser, measures every diagonal, and quotes the exact film, profile, and timeline. From measurement to install: usually 5–10 days for detached, 2–4 weeks for condos with board notice.FAQ
Can the install be done in cold weather? Yes. The room is heated regardless of outdoor temperature. Toronto winter installs are routine. Will my smoke alarms go off? No. Direct-fired propane CO output is below alarm threshold for the install duration. If the alarm is hardwired and you're nervous, the installer can temporarily disconnect with your permission and reconnect at the end. What if a fixture is in the wrong place? It can be moved during the install — that's an electrician's job, scheduled before the stretch crew arrives. Coordination is part of what RenoHouse does. How long until I can have a party in that room? Immediately. Once the walkthrough is done, the ceiling is at full tension and the room is vented. No drying time, no off-gassing on premium A+ films.Continue Reading
- Stretch Ceiling Installation & Care in Toronto: The Complete 2026 Owner
- The 2–3 Hour Stretch Ceiling Install in Toronto: What
- Stretch Ceiling Installation Cost Breakdown 2026: Where Every Dollar Goes