# Tools for Wood Floor Installation: Full GTA Checklist
Quick answer. Installing hardwood or engineered wood flooring in a Toronto or GTA home calls for roughly 10–15 tools; the two you almost certainly need to rent — a flooring nailer and a miter saw — cost $40–$90 per day from rental yards across the GTA in 2026. Budget $80–$200 for tool rental on a standard 400–600 sq ft floor, plus $15–$60 for consumables like spacers and chalk line.What It Costs to Tool Up for Hardwood Flooring in the GTA (2026 Prices)
Tools fall into three categories: specialty equipment you almost certainly need to rent, basic tools most homeowners already own, and small consumables that cost almost nothing. Sorting this out before you start saves a wasted trip to a rental yard in Mississauga or Brampton.
Specialty rental tools are the biggest cost variable. A pneumatic or manual flooring nailer — also called a cleat nailer or staple nailer — is the single most-used piece of equipment for solid hardwood installation. Rental yards across the GTA, including Sunbelt Rentals, Home Depot, and independent tool shops in Scarborough, Etobicoke, and North York, charge $40–$80 per day in 2026. A compound miter saw, essential for cutting boards to length at precise angles, rents for $50–$90 per day. If you need to rip boards lengthwise for wall edges, a table saw adds $80–$120 per day. For a standard weekend install, plan on two rental days; that puts your specialty-tool bill at $170–$290 depending on what you source.
Power tools you may already own include a circular saw for rough cuts and subfloor prep, a jigsaw for cutting around door casings and floor vents, and a drill/driver for face-nailing and any subfloor fastening. If you need to buy rather than rent, a mid-range circular saw runs $100–$250 at Canadian Tire or Home Depot; a decent jigsaw is $80–$180. Buying only makes economic sense if you plan to use these tools across future renovation projects.
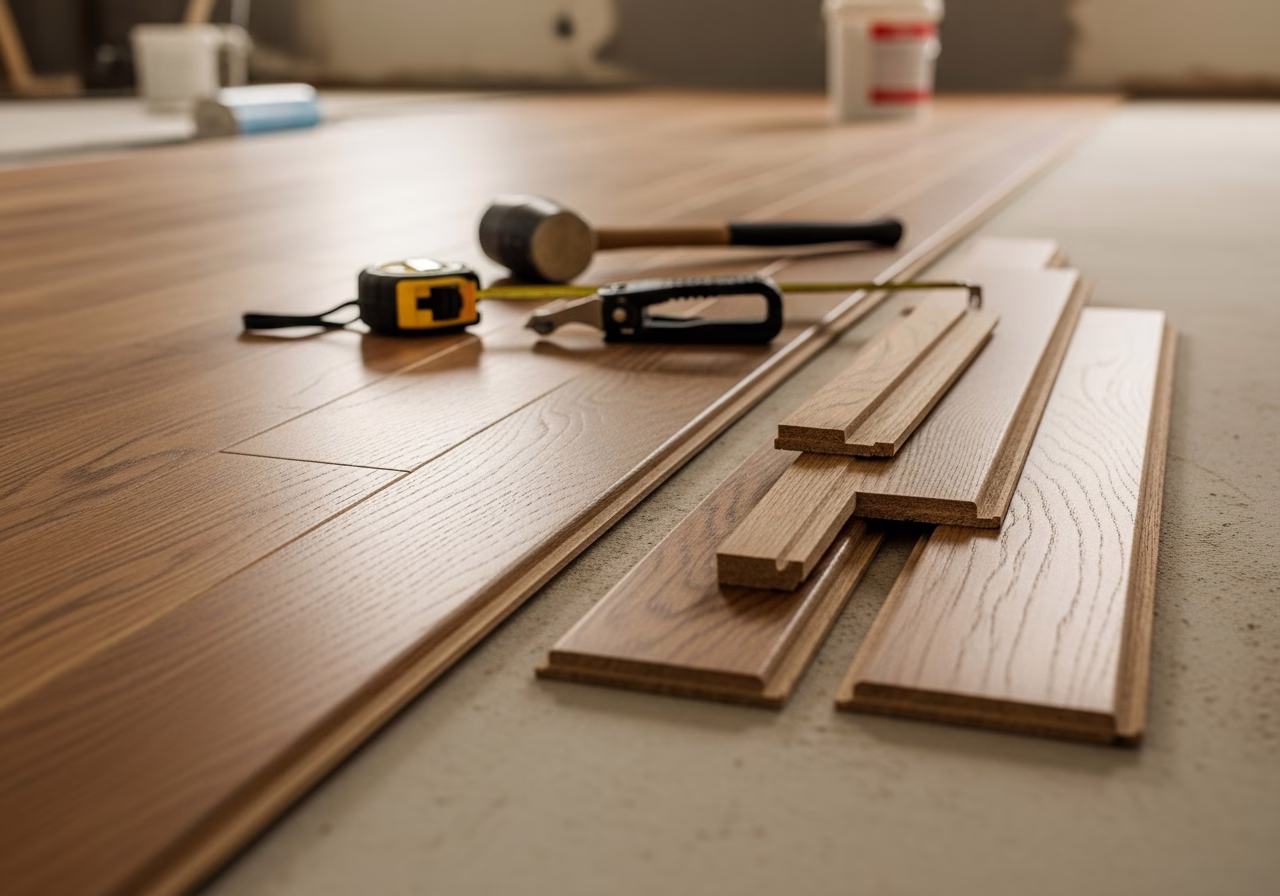
Hand tools and consumables are the lowest-cost category but easy to overlook. A tapping block, a pull bar, and a rubber mallet together cost $30–$60 as a flooring kit from any big-box or specialty flooring store. Plastic expansion-gap spacers — typically 8–10 mm wedges — run $8–$15 per bag. A chalk line for snapping layout reference lines costs $15–$30, and a quality moisture meter for checking subfloor and wood moisture content runs $30–$100. Skipping the moisture meter is the most common cause of failed hardwood floors in GTA homes.
| Tool | Buy (2026 GTA) | Rent Per Day (2026 GTA) | Likely Owned? |
|---|---|---|---|
| Pneumatic flooring nailer | $300–$550 | $40–$80 | Rarely |
| Compound miter saw | $350–$650 | $50–$90 | Sometimes |
| Table saw | $400–$900 | $80–$120 | Rarely |
| Circular saw | $100–$250 | $35–$60 | Often |
| Jigsaw | $80–$180 | $25–$45 | Sometimes |
| Moisture meter | $30–$100 | N/A | Rarely |
| Tapping block + pull bar kit | $30–$60 | N/A | No |
| Spacers (bag) | $8–$15 | N/A | No |
| Chalk line | $15–$30 | N/A | Sometimes |
| Pry bar | $15–$35 | N/A | Sometimes |
A first-time DIY installer who already owns a drill and circular saw but needs to rent a nailer and miter saw for two days and buy the hand tool kit should budget $350–$550 in 2026 for tools alone, not counting flooring material.
Need professional renovation?
Call RenoHouse at 289-212-2345 or get a free estimate today.
Get Free Estimate →How Each Tool Gets Used During Installation
Assess the subfloor first. Before any flooring goes down, press a moisture meter against the subfloor — typically OSB or plywood in GTA homes — and against a sample board from the flooring package. Subfloor moisture should generally sit below 12%, and the wood flooring should be within 4% of that reading. If the gap is larger, the wood needs to acclimate in the room for 48–72 hours. Skipping this step is the leading cause of gapping, cupping, and buckling in hardwood floors across Mississauga, Oakville, and Richmond Hill homes.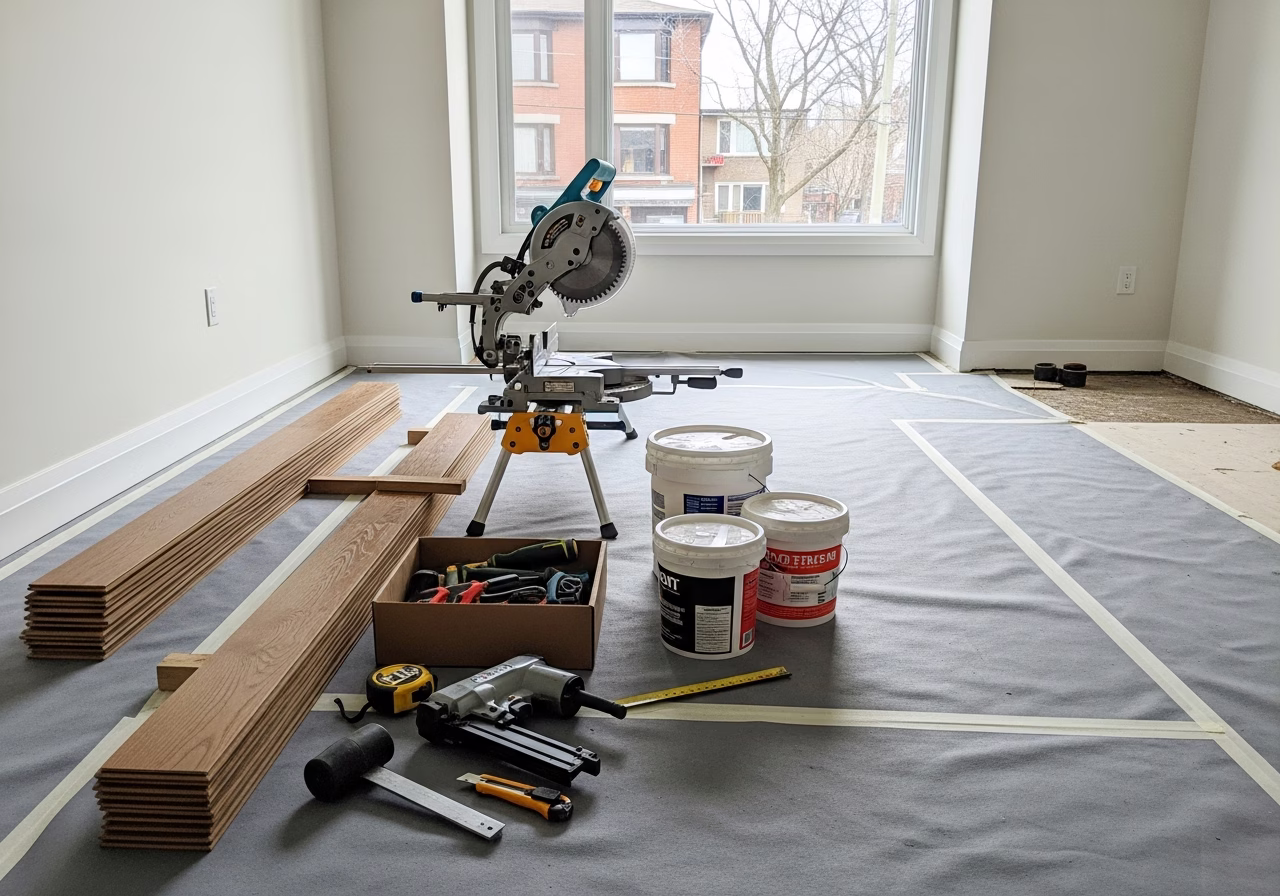
A note on permits: hardwood floor installation in Toronto, Mississauga, and across the GTA does not require a building permit as a standalone project. If the scope includes adding radiant heat beneath the flooring, the electrical elements require an ESA-permitted inspection, and a hydronic system may require a mechanical permit depending on the municipality. Check with your local building department before proceeding with any heated floor component.
Rent, Buy, or Hire a Pro: Comparing Your Options
For a single-floor project, renting specialty tools is almost always the better financial decision. A pneumatic flooring nailer purchased new costs $300–$550; the same tool rents for $40–$80 per day. Unless you are renovating multiple properties or planning several flooring projects per year across Brampton, Pickering, or elsewhere in the GTA, a purchased nailer will sit unused between projects and depreciate.
A compound miter saw is the closer call. At $350–$650 to buy, it pays for itself after five or six rental days — and unlike a flooring nailer, it is useful for trim work, door installation, deck framing, and dozens of other tasks around the house. Many GTA homeowners in Vaughan, Markham, and Oakville find that once they own a miter saw it earns regular use across multiple projects over the years.
Hiring a professional installer removes the tool decision entirely. A qualified flooring contractor brings their own equipment; you pay for labor and expertise. Professional hardwood floor installation across Toronto and the GTA runs $4–$8 per square foot for labor in 2026, depending on board width, layout pattern, and subfloor condition. On a 600 sq ft main floor, that is $2,400–$4,800 in labor. For homeowners who are not comfortable operating a pneumatic nailer or compound miter saw — or whose floor plan involves complex angles, multiple room transitions, or a problematic subfloor — the professional route eliminates both tool cost and material waste from bad cuts.
A few scenarios where the tool list grows well beyond the basics: subfloor soft spots or height variation exceeding 3/16 inch per 10 feet; rooms with multiple angles, alcoves, or transitions to tile or carpet; solid hardwood being installed over a concrete slab, which requires a glue-down or floating method distinct from standard nail-down. In each of these cases, the cost of errors — wasted material and a potentially failed floor — rises sharply.
Frequently Asked Questions
Do I need a pneumatic flooring nailer, or will a manual one work?
Both work, and both rent at tool yards across the GTA. A manual mallet-driven nailer rents for roughly $40–$55 per day and requires no compressor. A pneumatic model is faster and less physically demanding, especially on floors over 400 sq ft. For a single bedroom in a Toronto condo or small bungalow, the manual version is adequate. For a full main floor or open-plan basement, the pneumatic nailer saves considerable time and physical effort.
Can I use the same tools for engineered hardwood as for solid hardwood?
For nail-down or staple-down engineered hardwood, yes — the same flooring nailer, miter saw, tapping block, pull bar, and spacers apply. Floating click-lock engineered hardwood is different: no nailer is needed, only a tapping block, pull bar, mallet, and saw for cuts. A moisture meter matters regardless of format, particularly over concrete subfloors in Scarborough, North York, or any below-grade installation in the GTA.
What is the expansion gap, and how do I maintain it during install?
The expansion gap is the space left between the flooring and all vertical surfaces — walls, cabinets, door casings — so the wood can expand and contract with seasonal humidity changes. In Toronto's climate, 10–12 mm is the standard minimum. Plastic spacer wedges inserted along the perimeter before installation begins maintain this gap automatically. Once baseboard or quarter-round trim is reinstalled after the floor is complete, the gap is fully hidden.
Is a moisture meter worth buying for a one-time flooring install?
A basic pin-type moisture meter costs $30–$60 at Home Depot, Lee Valley, or Rona locations across the GTA. For a single install, buying one outright is worth it. Cupping, gapping, or buckling caused by moisture mismatch costs $800–$3,500 to repair in the GTA depending on severity. Spending $40 before committing to a full nail-down floor to verify that the subfloor and wood are within acceptable moisture range is straightforward risk management.
Need a quote in the GTA?
If your project involves subfloor issues, a complex floor plan, or you would rather skip the tool-rental logistics altogether, Reno House handles hardwood and engineered wood floor installation across Toronto, Etobicoke, Mississauga, Vaughan, Oakville, and the broader GTA. With 12 years in the trade, a 4.9-star rating across 498 reviews, and all work fully licensed and insured, the job gets done right the first time. Call 289-212-2345 or fill out the free quote form on the site for a straight answer on scope, timeline, and cost.