# Complete Drywall Guide Toronto 2026 | Installation, Repair & Taping Costs
Quick answer. Drywall is the backbone of every modern Toronto home. Whether you're finishing a basement in Scarborough, patching a hole in an Etobicoke bungalow, or renovating a century home in East York, drywall is the material that defines your interior walls and ceilings.Drywall is the backbone of every modern Toronto home. Whether you're finishing a basement in Scarborough, patching a hole in an Etobicoke bungalow, or renovating a century home in East York, drywall is the material that defines your interior walls and ceilings. It's affordable, fire-resistant, and when installed properly, creates a smooth, paint-ready surface that lasts for decades.
But drywall doesn't last forever. Settlement cracks appear. Doorknobs punch through walls. Toronto's freeze-thaw cycles and basement moisture take their toll. That's why understanding drywall — from installation to repair, taping, and finishing — is essential for every homeowner and property manager in the GTA.
This guide covers everything you need to know about drywall in Toronto for 2026: how much drywall installation costs per square foot, the difference between drywall and plaster, how to find a reliable drywall contractor, and when it's worth calling a professional versus tackling a repair yourself. Whether you're budgeting a full renovation or just need a quick fix, this is your complete resource.
---
Drywall Installation
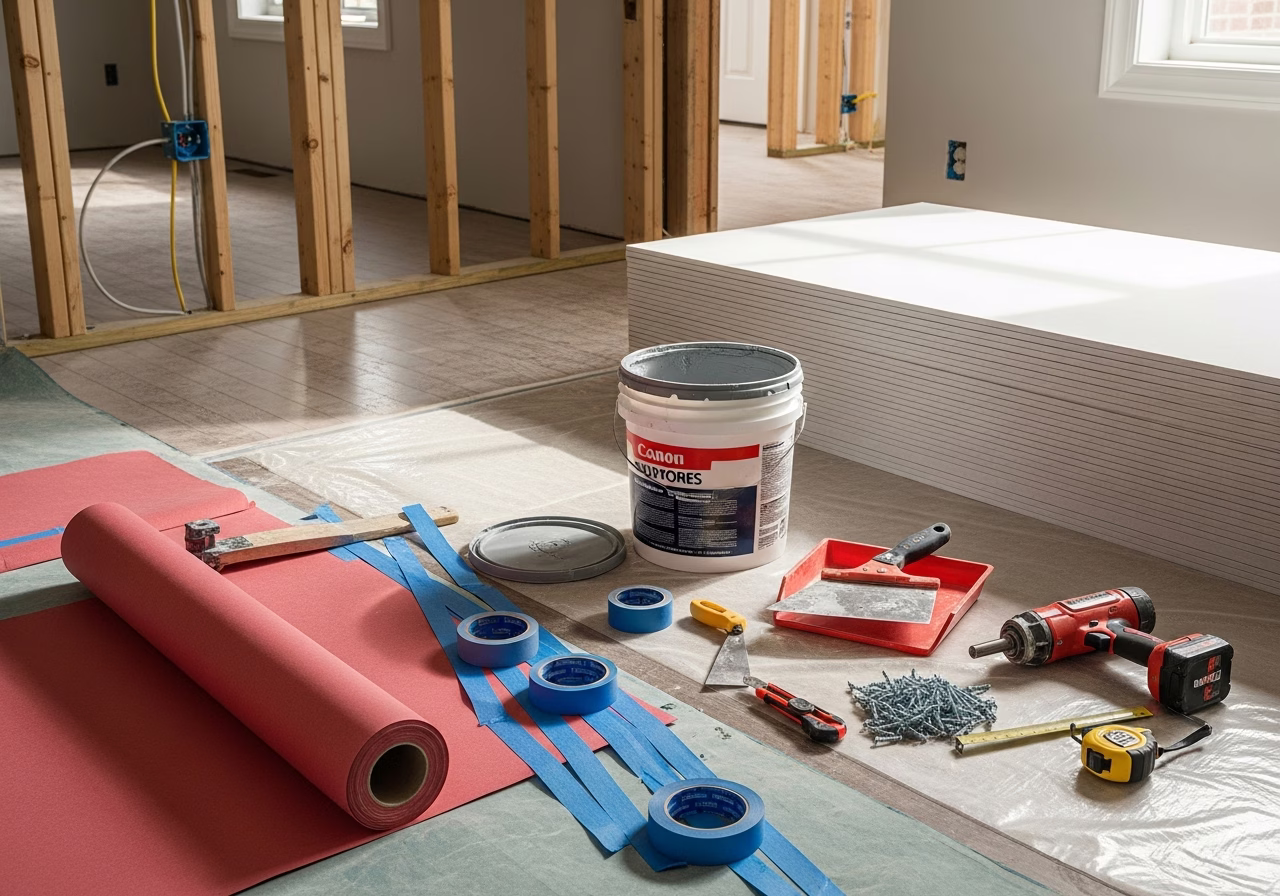
Drywall installation is a multi-step process that transforms bare framing into smooth, finished walls and ceilings. In Toronto, new drywall installation is most commonly needed for basement finishing, home additions, room reconfigurations during renovations, and new-build construction. Understanding each step helps you evaluate quotes and communicate effectively with your drywall contractor.
The Drywall Installation Process
Professional drywall installation follows a consistent sequence of steps, regardless of the project size:
1. Measuring and PlanningBefore a single sheet goes up, your contractor measures every wall and ceiling surface, accounts for doors, windows, electrical boxes, and plumbing penetrations, and calculates how many 4×8 or 4×12 sheets are needed. Proper planning minimizes waste and ensures seams fall in the least visible locations.
2. Hanging (Boarding)Drywall sheets are attached to wood or metal studs using drywall screws. Ceilings go up first, then walls. Sheets are hung horizontally on walls to reduce the total length of seams. Experienced installers stagger the joints for added strength and easier taping. In Toronto homes with 9-foot or 10-foot ceilings — common in newer builds across North York and Willowdale — 4×10 or 4×12 sheets are used to eliminate horizontal seams entirely.
3. TapingPaper or fiberglass mesh tape is applied over every seam and inside corner. This is the foundation for a smooth finish — rushed taping shows through paint.
4. Mudding (Joint Compound)Three coats of joint compound are applied over the tape, each one wider than the last. The first coat embeds the tape, the second builds up the surface, and the third feathers the edges for an invisible transition.
5. SandingOnce the compound is fully dry, the entire surface is sanded smooth. This creates significant dust, which is why professional crews use dustless or low-dust sanding systems — a major advantage over DIY work.
6. PrimingA coat of drywall primer seals the joint compound and bare paper, creating a uniform surface for paint. Skipping this step results in flashing — visible differences in sheen where compound meets paper.
Drywall Types and Thickness Options
Not all drywall is the same. The type and thickness you need depends on where it's going:
| Type | Thickness | Common Use | Notes |
|---|---|---|---|
| Standard (white board) | 1/2" | Most walls and ceilings | Default for residential use |
| Fire-rated (Type X) | 5/8" | Garage walls, furnace rooms, between units | Required by Ontario Building Code in specific locations |
| Moisture-resistant (green board) | 1/2" or 5/8" | Bathrooms, kitchens, laundry rooms | Not waterproof — not for direct wet areas |
| Mold-resistant (purple board) | 1/2" or 5/8" | Basements, high-humidity areas | Fiberglass face resists mold growth |
| Lightweight | 1/2" | Ceilings, renovations | 25% lighter than standard — easier to handle overhead |
| Soundproof (QuietRock) | 5/8" | Home theaters, bedrooms, shared walls | STC rating of 50+ vs. 33 for standard |
In Toronto, the most common choice for residential projects is 1/2" standard drywall for walls and 5/8" Type X for ceilings (to meet fire-code requirements in many applications). For basement finishing — one of the most popular renovations across the GTA — mold-resistant board is strongly recommended given Toronto's well-documented basement moisture challenges.
Drywall Installation Cost in Toronto
The drywall installation cost in Toronto varies based on the scope of work, ceiling height, type of drywall, and the level of finish required. Here's what to expect in 2026:
| Project Component | Cost Range |
|---|---|
| Drywall supply (per 4×8 sheet) | $15 – $25 |
| Hanging only (per sq ft) | $1.00 – $1.75 |
| Hanging + taping + finishing (per sq ft) | $2.50 – $4.50 |
| Full installation including materials (per sq ft) | $3.00 – $5.50 |
| Basement finishing (average 800 sq ft) | $3,500 – $6,500 |
- Ceiling height: Standard 8-foot ceilings are most affordable. 9-foot and 10-foot ceilings — increasingly common in new builds across North York, Willowdale, and Scarborough — cost 15–25% more due to larger sheets and scaffolding requirements.
- Complexity: Bulkheads, soffits, arches, and multiple cutouts for pot lights add labour.
- Access: Second-floor rooms with narrow stairways or tight hallways increase handling time.
- Finish level: A Level 3 finish for a garage costs significantly less than a Level 5 finish for a living room.
- Material upgrades: Moisture-resistant or soundproof drywall adds $5–$15 per sheet over standard.
For most Toronto homeowners, budget $3.00–$4.50 per square foot installed for a standard residential project with a Level 4 finish.
---
Drywall Repair
Drywall repair is one of the most common home maintenance tasks in Toronto. From small nail pops in a York townhouse to large water-damaged sections in an East York bungalow, drywall damage is inevitable over time. The good news: most repairs are straightforward and affordable when handled properly.
Common Types of Drywall Damage
Nail PopsNails or screws push through the surface as the home settles and lumber shrinks. Extremely common in Toronto homes that are 5–15 years old. You'll see small circular bumps or cracks in the paint, especially on ceilings.
Small HolesDoorknob impacts, picture-hanging gone wrong, or accidental hits during furniture moves. Typically 1–4 inches in diameter.
Medium HolesPlumbing access cuts, failed TV mounts, or accidental damage during other trades' work. Usually 4–12 inches.
CracksSettlement cracks appear at corners of windows and doors as the home shifts. Stress cracks develop along seams, especially at joints between walls and ceilings. In older Toronto homes — particularly in York, East York, and Etobicoke — cracks can be chronic due to decades of soil movement.
Water DamageStained, soft, or bubbling drywall from roof leaks, plumbing failures, or basement moisture. This is the most serious type of damage because it often involves hidden mold and compromised structural integrity.
Dents and ScuffsSurface-level damage from moving furniture, children's toys, or general wear. The paper face is torn but the core gypsum is intact.
Drywall Repair Methods by Size
| Damage Size | Repair Method | DIY Difficulty | Professional Cost |
|---|---|---|---|
| Nail pops | Reset screw, fill, sand, paint | Easy | $75 – $125 per room |
| Small hole (< 4") | Self-adhesive patch + compound | Easy | $100 – $175 |
| Medium hole (4–12") | California patch or backing board | Moderate | $150 – $300 |
| Large hole (> 12") | Cut-and-replace section | Hard | $250 – $500 |
| Ceiling crack | Tape, compound, repaint | Moderate | $150 – $350 |
| Corner bead damage | Replace corner bead + refinish | Hard | $200 – $400 |
| Water damage (per area) | Cut out, dry, replace, refinish | Professional only | $300 – $800+ |
For holes between 4 and 10 inches, the California patch (also called a hot patch or butterfly patch) is the preferred repair method. A piece of drywall slightly larger than the hole is scored on the back, and the gypsum core is snapped away around the edges, leaving only the paper face as a built-in "tape." The patch is fitted into the hole and the paper edges are mudded smooth. When done correctly, the repair is virtually invisible.
DIY Drywall Repair vs. Hiring a Professional
When to DIY:- Nail pops (simple reset and fill)
- Small holes under 4 inches
- Single, isolated dents or scuffs
- You're comfortable with sanding and painting
- The damaged area is in a low-visibility location (closet, garage, basement)
- Multiple repairs across several rooms (pros work faster and achieve consistent results)
- Ceiling damage (overhead work is physically demanding and hard to finish seamlessly)
- Water damage (requires assessment for mold and structural integrity)
- Any repair in a high-visibility area where finish quality matters (living room, hallway, kitchen)
- Textured ceilings or walls that need to be matched
The average Toronto homeowner pays $150–$350 per repair for professional drywall work. Many drywall companies offer discounted rates when you bundle multiple repairs in a single visit, which is the most cost-effective approach if you have a list of patches throughout the house.
---
Drywall Taping
Drywall taping is the process that separates a rough installation from a smooth, paint-ready surface. It's the most skill-intensive phase of any drywall project, and it's where the quality of your finished walls is ultimately determined. In Toronto's competitive real estate market, the quality of your drywall finish is immediately visible to buyers and appraisers — a poor taping job can undermine an otherwise excellent renovation.
The Drywall Taping Process
Professional drywall taping follows a structured sequence:
Coat 1 — Taping (Bed Coat)Paper tape or fiberglass mesh is embedded in a thin layer of joint compound over every seam, inside corner, and outside corner. Paper tape is preferred by most Toronto professionals for flat seams because it's stronger and less prone to cracking. Mesh tape is used primarily with setting-type compound for its faster setup.
Coat 2 — Fill CoatA wider layer of compound is applied over the tape, building up the seam and beginning to feather the edges outward. This coat typically extends 6–8 inches on either side of the seam.
Coat 3 — Skim Coat (Finish Coat)The final coat is the widest and thinnest, feathering the compound 10–12 inches from the seam center. This creates the gradual transition that makes the seam invisible once painted. Screw dimples also receive their final fill.
SandingAfter the final coat dries (typically 24 hours), the surface is sanded with 120–150 grit paper or sanding sponge. Professional crews use pole sanders and dustless vacuum systems.
Levels of Drywall Finish
The drywall industry defines five levels of finish, each suited for different applications:
| Level | Description | Typical Use | Cost Impact |
|---|---|---|---|
| Level 0 | No taping or finishing | Temporary construction, concealed spaces | Lowest |
| Level 1 | Single coat of compound over tape | Above-ceiling plenums, attic spaces, areas concealed by other finishes | Low |
| Level 2 | Two coats of compound over tape, one coat on fasteners | Garages, warehouses, areas receiving tile or stone | Low–Medium |
| Level 3 | Three coats total, sanded | Areas receiving heavy texture | Medium |
| Level 4 | Three coats, fully sanded and smooth | Standard for most residential walls and ceilings | Standard |
| Level 5 | Level 4 + full skim coat over entire surface | High-gloss paint areas, critical lighting (e.g., entertainment walls, hallways with raking light) | Premium (+30–50%) |
Drywall Taping Costs in Toronto
| Service | Cost Range |
|---|---|
| Taping and finishing only (per sq ft of wall/ceiling) | $1.25 – $2.50 |
| Level 4 finish — standard room | $500 – $1,200 |
| Level 5 finish — standard room | $800 – $1,800 |
| Full basement taping (800 sq ft) | $2,000 – $4,000 |
---
Drywall Ceiling
Drywall ceiling installation and repair presents unique challenges that make it more complex and more expensive than wall work. Gravity works against you, the finish is more visible (overhead lighting reveals every imperfection), and the physical demands are significantly greater.
Why Ceiling Drywall Costs More
Expect to pay 20–40% more for ceiling drywall work compared to equivalent wall work. The reasons are straightforward:
- Overhead lifting: 4×8 sheets of 1/2" drywall weigh approximately 57 pounds each. Holding, positioning, and fastening these sheets overhead requires either a drywall lift (mechanical hoist) or a two-person crew.
- 5/8" requirement: Many ceiling applications in Toronto require 5/8" Type X (fire-rated) drywall per Ontario Building Code, especially in multi-unit dwellings and rooms below living spaces. These sheets weigh roughly 70 pounds each.
- Finish quality: Ceilings are viewed under raking light from windows, which highlights even minor imperfections. Level 4 or Level 5 finish is essential.
- Scaffolding and staging: Rooms with 9-foot or higher ceilings require scaffolding, adding setup time and cost.
Drywall Ceiling Costs in Toronto
| Service | Cost Range |
|---|---|
| New ceiling drywall installed + finished (per sq ft) | $4.00 – $6.50 |
| Ceiling patch repair | $200 – $500 |
| Popcorn ceiling removal + new drywall (per sq ft) | $3.50 – $6.00 |
| Popcorn removal only (scrape + refinish, per sq ft) | $2.00 – $4.00 |
| Ceiling with pot-light cutouts (per light) | $25 – $50 additional |
Popcorn Ceiling Removal in Toronto
Popcorn (textured, acoustic, or "cottage cheese") ceilings were standard in Toronto homes built between the 1960s and 1990s. They're now one of the most-requested removal jobs across the GTA. Here's what you need to know:
- Asbestos testing is mandatory for homes built before 1990. A lab test costs $30–$50 per sample and takes 2–5 business days. If asbestos is present, a licensed abatement contractor must handle the removal, which significantly increases cost.
- The process: The area is sealed and protected, the texture is dampened and scraped, the surface is repaired and refinished (typically Level 4 or Level 5), and then primed and painted.
- Timeline: A single room takes 2–3 days. A full house can take 1–2 weeks.
- Result: Smooth ceilings immediately modernize a home and are one of the highest-ROI cosmetic upgrades in the Toronto market.
Light Fixtures and Ceiling Drywall
When installing or replacing drywall ceilings, plan for your lighting early. Recessed pot lights (now standard in most Toronto renovations) require precise cutouts and junction box placement before the drywall goes up. Coordinating between your electrician and drywall installer saves time and avoids costly rework. If you're adding new pot lights to an existing ceiling, the drywall team may need to patch and refinish multiple access points.
---
Drywall vs Plaster
If you own an older Toronto home — particularly one built before 1960 in neighbourhoods like East York, York, the Annex, or Cabbagetown — your walls and ceilings are almost certainly plaster, not drywall. Understanding the difference between drywall and plaster is crucial when planning renovations, repairs, or upgrades.
Need professional drywall repair?
Call RenoHouse at 289-212-2345 or get a free estimate today.
Get Free Estimate →Key Differences: Drywall and Plaster
| Feature | Drywall | Plaster |
|---|---|---|
| Installation | Sheets screwed to studs | Wet plaster applied over wood lath in multiple coats |
| Thickness | 1/2" – 5/8" | 3/4" – 1" (with lath) |
| Hardness | Moderate — can dent | Very hard — resists dents |
| Sound insulation | Standard (STC ~33) | Better (STC ~40+) due to density |
| Crack resistance | Good when properly taped | Prone to cracking over time |
| Repair ease | Easy — patch and mud | Harder — requires matching technique |
| Cost to install | $3 – $5.50/sq ft | $8 – $15/sq ft |
| Cost to repair | $100 – $500 per area | $200 – $800 per area |
When to Replace Plaster with Drywall
In many older Toronto homes, the question isn't *if* but *when* to replace plaster with drywall. Here are the most common triggers:
- Extensive cracking: When plaster separates from the lath (visible bulging or hollow sound when tapped), patching becomes impractical.
- Renovation work: If you're opening walls for electrical upgrades, plumbing, or insulation, it's often more cost-effective to replace with drywall rather than re-plaster.
- Insulation upgrades: Many pre-1960 Toronto homes have little or no wall insulation. Removing plaster, insulating, and installing drywall is the standard approach.
- Moisture damage: Plaster that has been repeatedly wet (common in Toronto basements and bathrooms) loses its bond with lath and cannot be reliably repaired.
- The plaster is in good condition with only minor cosmetic cracks
- The home has heritage designation or you want to preserve the character
- You're not doing any work behind the walls
- The superior sound insulation of plaster is valuable (shared walls, bedrooms)
Cost Comparison: Repair vs. Replace
For a 12×12 room in Toronto:
| Option | Estimated Cost |
|---|---|
| Plaster repair (moderate cracking) | $1,500 – $3,000 |
| Remove plaster + install drywall | $2,500 – $4,500 |
| Remove plaster + insulate + drywall | $3,500 – $6,000 |
In many cases, the incremental cost of switching to drywall is minimal when compared to extensive plaster repair — especially when you factor in the improved energy efficiency from adding insulation.
---
Water Damage Drywall
Water-damaged drywall is one of the most serious and time-sensitive issues Toronto homeowners face. The combination of aging infrastructure, extreme weather events, and Toronto's notoriously high water table means that water intrusion is a when-not-if scenario for many properties — especially in older neighbourhoods across Etobicoke, York, East York, and Scarborough.
Signs of Water-Damaged Drywall
Catching water damage early prevents small problems from becoming expensive disasters:
- Discolouration: Yellow, brown, or grey stains on walls or ceilings, often with a ring-shaped border.
- Bubbling or peeling paint: Moisture trapped behind the paint film causes blistering.
- Soft spots: Drywall that gives when pressed has absorbed water and lost structural integrity.
- Warping or sagging: Drywall panels that bow outward (walls) or sag downward (ceilings) indicate significant water absorption.
- Musty odour: A persistent damp smell, even without visible damage, often indicates moisture behind walls.
- Visible mold: Black, green, or white fuzzy growth on the surface or along baseboard lines.
The Mold Risk
Here's why water-damaged drywall demands urgent attention: mold can begin growing within 24–48 hours of water exposure. Drywall's paper face and gypsum core are ideal food sources for mold. In Toronto's humid summers, growth accelerates dramatically.
Mold behind drywall is particularly dangerous because:
- It's invisible until the problem is severe
- Spores circulate through the HVAC system, affecting air quality throughout the home
- Health effects include respiratory issues, allergies, and more serious conditions for immunocompromised individuals
- Remediation costs increase exponentially the longer mold goes unaddressed
Toronto Basement Flooding and Drywall
Toronto experiences regular basement flooding events, driven by:
- Overloaded municipal storm sewers during heavy rainfall
- Sewer backups (especially in older combined-sewer neighbourhoods)
- High water table in areas across Scarborough, North York, and East York
- Foundation cracks that allow groundwater entry
- Failed sump pumps or weeping tile systems
- 1. Remove all affected drywall at least 12 inches above the water line — even drywall that looks dry may have wicked moisture upward.
- 2. Remove wet insulation — fibreglass batts and cellulose that get wet lose their insulating value and harbour mold.
- 3. Dry the framing thoroughly — use commercial dehumidifiers and fans for a minimum of 3–5 days. Moisture readings below 15% are required before new drywall goes up.
- 4. Treat framing with antimicrobial solution.
- 5. Install new mold-resistant drywall — for basements, always use mold-resistant (purple board) when replacing flood-damaged drywall.
Insurance Claims for Drywall Water Damage
Most Toronto homeowner insurance policies cover sudden and accidental water damage — a burst pipe, failed appliance, or acute sewer backup (if you have the endorsement). They generally do not cover gradual seepage, foundation leaks, or maintenance-related moisture.
Tips for successful claims:- Document everything immediately with photos and video
- Do not begin demolition until the adjuster has inspected (unless there's a safety hazard)
- Get written quotes from at least two drywall contractors
- Keep all receipts for emergency mitigation (fans, dehumidifiers, temporary repairs)
- Review your policy for sewer backup endorsement — many Toronto homeowners discover they don't have it after the fact
Water Damage Drywall Repair Costs
| Scenario | Cost Range |
|---|---|
| Small ceiling stain repair (leak fixed) | $200 – $500 |
| Wall section replacement (plumbing leak) | $300 – $800 |
| Basement flood restoration (per linear foot of wall) | $25 – $50 |
| Full basement drywall replacement (800 sq ft) | $4,000 – $8,000 |
| Mold remediation + drywall replacement | $5,000 – $15,000+ |
---
Drywall for Renovations
Drywall work is central to nearly every major renovation project in Toronto. Here are the most common renovation scenarios and what to expect.
Basement Finishing
Finishing an unfinished basement is the single most popular renovation across the GTA, and drywall is the largest component. A typical Toronto basement finishing project includes:
- Framing interior walls (if not already done)
- Insulating exterior walls (rigid foam or spray foam against concrete, plus fibreglass batts)
- Installing vapour barrier
- Hanging and finishing drywall on all walls and ceiling
- Accommodating bulkheads around ductwork, pipes, and beams
Room Additions and Second-Storey Additions
Toronto's building boom includes a massive number of home additions. Drywall for additions is straightforward — it's new construction conditions with full access, making it the most cost-effective scenario per square foot.
Garage Conversions
Converting an attached or detached garage into living space is increasingly popular in Toronto, especially in Etobicoke and North York where detached homes have oversized garages. Key drywall considerations:
- Fire-rated drywall (5/8" Type X) is required on the shared wall between the garage and the house (and ceiling, if there's living space above).
- Insulation + vapour barrier must be added to exterior walls before drywall.
- Garages often have unfinished or damaged drywall that needs full replacement.
Kitchen and Bathroom Renovations
When Toronto kitchens and bathrooms are gutted and renovated:
- Old drywall is typically removed to accommodate plumbing changes, electrical upgrades, and insulation improvements.
- Moisture-resistant drywall is required in bathrooms and recommended behind kitchen sinks.
- Cement board (not drywall) is used behind tile in showers and tub surrounds.
- Drywall around new kitchen layouts requires precise cutouts for outlets, switches, and undercabinet lighting.
---
Complete Drywall Cost Guide for Toronto 2026
Here is a comprehensive cost reference for all common drywall services in the Toronto market:
| Service | Unit | Cost Range (2026) |
|---|---|---|
| New Installation | ||
| Drywall hanging only | per sq ft | $1.00 – $1.75 |
| Drywall hanging + taping + finishing | per sq ft | $2.50 – $4.50 |
| Full install with materials | per sq ft | $3.00 – $5.50 |
| 5/8" fire-rated (Type X) upgrade | per sheet | +$3 – $6 |
| Mold-resistant (purple board) upgrade | per sheet | +$5 – $10 |
| Soundproof (QuietRock) | per sheet | +$35 – $55 |
| Repairs | ||
| Nail pop repair | per room | $75 – $125 |
| Small hole patch (< 4") | per patch | $100 – $175 |
| Medium hole repair (4–12") | per patch | $150 – $300 |
| Large hole / section replacement | per area | $250 – $500 |
| Ceiling crack repair | per crack | $150 – $350 |
| Corner bead replacement | per corner | $200 – $400 |
| Taping & Finishing | ||
| Taping + finishing (Level 4) | per sq ft | $1.25 – $2.50 |
| Level 5 skim coat | per sq ft | $2.00 – $3.50 |
| Ceilings | ||
| New ceiling drywall installed + finished | per sq ft | $4.00 – $6.50 |
| Ceiling patch repair | per patch | $200 – $500 |
| Popcorn removal + refinish | per sq ft | $2.00 – $4.00 |
| Popcorn removal + new drywall | per sq ft | $3.50 – $6.00 |
| Water Damage | ||
| Small stain repair | per area | $200 – $500 |
| Wall section replacement | per area | $300 – $800 |
| Basement flood restoration | per linear ft | $25 – $50 |
| Full basement replacement (800 sq ft) | project | $4,000 – $8,000 |
| Specialty | ||
| Plaster removal + drywall replacement | per sq ft | $4.00 – $7.00 |
| Basement finishing (drywall only, 800 sq ft) | project | $3,500 – $6,500 |
| Garage conversion drywall | project | $2,000 – $5,000 |
| Soundproofing wall upgrade (QuietRock) | per sq ft | $5.00 – $9.00 |
*Note: Prices reflect the Toronto and GTA market for 2026. Actual costs vary based on project complexity, access, finish level, and material choices. HST not included.*
Minimum charge: Most drywall contractors in Toronto have a minimum charge of $250–$500 for small repair jobs, regardless of the actual scope of work. This covers mobilization, setup, materials, and the minimum labour involved. If you have multiple small repairs, bundling them into a single service call provides the best value.---
How to Choose a Drywall Contractor in Toronto
Choosing the right drywall contractor can make or break your project. Drywall finishing is one of the few trades where the quality of workmanship is permanently visible — every bump, ridge, and visible seam will show through paint for the life of the wall. Here's how to find a reliable professional among the many drywall companies serving the GTA.
What to Look For
1. Specialization in DrywallThe best results come from dedicated drywall contractors, not general handymen. Drywall taping and finishing is a specialized skill that requires years of practice. Ask if drywall is their primary trade.
2. Verifiable References and PortfolioAsk for photos of completed projects and contact information for recent clients. A quality drywall contractor will have no hesitation providing this. Look for consistent, smooth finishes — especially in photos taken with raking light.
3. Proper InsuranceAt minimum, your drywall contractor should carry:
- Commercial general liability insurance ($2M minimum)
- WSIB (Workplace Safety and Insurance Board) coverage for all workers
A professional quote should specify:
- Scope of work (which rooms, walls, ceilings)
- Type and thickness of drywall
- Level of finish
- Number of coats of compound
- Whether primer is included
- Timeline with start and completion dates
- Payment schedule
Drywall work cannot be rushed. Each coat of compound needs 24 hours to dry under normal conditions (longer in humid weather or unheated spaces). A contractor who promises to tape and finish a room in one day is cutting corners.
6. Clean WorksiteDrywall creates significant dust. Ask about dust-containment measures — plastic sheeting over doorways, floor protection, and dustless sanding equipment. Top-tier drywall companies include cleanup as part of their service.
Red Flags to Watch For
🚩 No written contract or quote — verbal agreements leave you exposed
🚩 Requesting full payment upfront — standard practice is a deposit (10–25%) with progress payments and final payment upon completion
🚩 No insurance or WSIB — you're liable if a worker is injured on your property
🚩 Unusually low prices — below-market quotes often mean thinner coats, fewer passes, or inexperienced labour
🚩 Rushing the timeline — promising one-day taping or skipping sanding indicates poor quality
🚩 Unable to explain finish levels — a professional should know and be able to explain Levels 1–5
🚩 No references — unwillingness to provide references or a portfolio is a significant warning sign
🚩 Pressuring you to decide immediately — reputable drywall contractors don't need high-pressure tactics
---
10 Drywall Mistakes to Avoid
Whether you're doing it yourself or overseeing a contractor, these are the most common drywall mistakes that lead to poor results:
1. Skipping the Primer
Unpainted drywall and joint compound absorb paint differently, creating visible differences in sheen (flashing). Always apply a dedicated drywall primer before painting — not just a paint-and-primer-in-one product.
2. Not Sanding Between Coats
Each coat of joint compound should be sanded lightly before the next application. Skipping this creates ridges, bumps, and an uneven surface that shows through paint.
3. Applying Compound Too Thick
Thick coats of mud crack as they dry, require excessive sanding, and create visible edges. Three thin coats always outperform one thick coat.
4. Using the Wrong Tape
Paper tape and mesh tape serve different purposes. Paper tape is stronger for flat seams and inside corners. Mesh tape is appropriate with setting-type compound for quick repairs. Using mesh tape with all-purpose compound on flat seams often leads to cracking.
5. Ignoring Moisture Issues
Installing standard drywall in moisture-prone areas (basements, bathrooms) without moisture-resistant board is a guaranteed mold problem in Toronto's climate. Spend the extra $5–$10 per sheet for appropriate materials.
6. Improper Screw Depth
Screws driven too deep break through the paper face, reducing holding power. Screws not driven deep enough protrude through the surface and show through paint. A proper drywall screw sits just below the paper surface without breaking through.
7. Hanging Walls Before Ceilings
Ceiling drywall should always be installed first, with wall sheets butting up underneath. This provides cleaner corners and better structural support. Reversing this order creates messy, weak ceiling-to-wall joints.
8. Not Staggering Seams
Aligning all seams in a straight line across a wall creates a structural weakness and a visible line that's nearly impossible to hide. Always stagger sheets so seams are offset.
9. Rushing Dry Times
Each coat of compound needs 24 hours minimum to dry (more in cold or humid conditions). Applying the next coat over wet mud traps moisture, causes shrinking, and leads to cracking. There are no shortcuts.
10. Forgetting Electrical and Plumbing Before Drywalling
All wiring, plumbing, HVAC, and insulation must be installed and inspected before drywall goes up. Cutting into fresh drywall to run a missed wire is wasteful and creates unnecessary repair work. In Toronto, electrical and plumbing rough-ins must pass municipal inspection before drywall covers them.
---
Related Guides
Dive deeper into specific topics:
Explore related renovation topics:
Explore related renovation topics:
Frequently Asked Questions About Drywall
How much does it cost to drywall a room in Toronto?
For a standard 12×12 room with 8-foot ceilings, expect to pay between $1,200 and $2,500 for full drywall installation and finishing (including materials). This covers hanging, taping, three coats of compound, sanding, and priming. Costs increase for higher ceilings, complex layouts, or premium finish levels.
How do I find drywall repair near me?
The most reliable way to find quality drywall repair near me in Toronto is through referrals from neighbours or your real estate agent. Online platforms like HomeStars, Google Reviews, and the Better Business Bureau (BBB) also help identify reputable local drywall companies. Always check that any contractor you hire carries liability insurance and WSIB coverage. For professional drywall repair in the Toronto area, contact our team for a free estimate.
Can I repair drywall myself?
Yes, for small repairs. Nail pops, small holes under 4 inches, and minor dents are manageable DIY projects with a basic toolkit (putty knife, joint compound, sandpaper, patch kit). For larger repairs, ceiling work, or any water damage situation, professional results are difficult to achieve without experience. The most common DIY mistake is underestimating how many coats and how much sanding are needed for an invisible repair.
What's the difference between drywall and plaster?
Drywall is a manufactured panel (gypsum core sandwiched between paper faces) that's screwed directly to studs. Plaster is a wet-applied material built up in layers over wood lath strips. Plaster is harder, denser, and provides better sound insulation, but it's much more expensive to install and repair. In Toronto, homes built before the late 1950s typically have plaster walls, while newer homes use drywall exclusively. See our detailed comparison above.
How long does drywall installation take?
For a typical Toronto renovation project like a basement finishing (approximately 800 square feet), expect 7–14 days from start to paint-ready. This includes 1–2 days for hanging, 4–7 days for taping and finishing (allowing proper dry time between each of the three coats), and 1–2 days for sanding and priming. Rushing this timeline compromises quality.
What is Level 5 drywall finish and do I need it?
Level 5 is the highest standard of drywall finish, involving a full skim coat of compound applied over the entire surface after standard taping and finishing. This creates a perfectly uniform surface that shows no imperfections under any lighting condition. You need Level 5 if you're applying semi-gloss or high-gloss paint, if walls receive strong raking light from large windows, or for feature walls in high-end renovations. For standard flat or eggshell paint, Level 4 is sufficient and more cost-effective.
Is drywall waterproof?
No. Standard drywall is not waterproof and should never be exposed to direct water. Even moisture-resistant (green board) and mold-resistant (purple board) drywall are designed to resist *moisture*, not direct water contact. For areas with direct water exposure — shower surrounds, tub enclosures — cement board (e.g., Durock, Kerdi-Board) must be used instead of drywall.
How do I know if my drywall has mold?
Signs of mold behind drywall include: persistent musty odour, visible mold growth (black, green, or white spots) on the surface, recurring allergic symptoms in the home, and water stains or discolouration. To confirm, you can hire a certified mold inspector ($300–$500 for a Toronto home inspection) or carefully cut a small inspection hole in a concealed area. Do not disturb suspected mold without proper protection — N95 mask at minimum.
Should I remove popcorn ceilings before selling my Toronto home?
In most cases, yes. Smooth ceilings are strongly preferred by Toronto buyers and can increase perceived home value significantly. The cost of popcorn removal ($2–$4 per square foot) is typically recouped through a faster sale and potentially higher offers. However, if the popcorn texture was applied before 1990, you must test for asbestos first. If asbestos is present, removal costs increase substantially, and some sellers choose to encapsulate (drywall over the popcorn) instead.
Do I need a permit for drywall work in Toronto?
Drywall installation itself does not require a City of Toronto building permit. However, the work that typically precedes drywalling — framing, electrical, plumbing, insulation, and structural changes — usually does require permits and inspections. If you're finishing a basement, adding a room, or making structural changes, your contractor must obtain the necessary permits and schedule inspections *before* drywall goes up. The City of Toronto will require you to remove drywall if inspectors need to verify concealed work that was covered without inspection.
---
Get a Free Drywall Estimate in Toronto
Whether you need a small patch in Etobicoke, a full basement finish in Scarborough, or popcorn ceiling removal in North York, our experienced drywall team delivers smooth, flawless results — on time and on budget.
Here's what you get when you choose us:- ✅ Free, detailed written estimate — no obligation
- ✅ Licensed, insured, and WSIB-covered crews
- ✅ Level 4 and Level 5 finishes — your choice
- ✅ Dustless sanding systems for a clean worksite
- ✅ Serving all Toronto neighbourhoods: Etobicoke, York, East York, North York, Scarborough, Willowdale, and across the GTA
📞 Call us for same-week estimates on any drywall project — from a single patch to a whole-home renovation.
Sources & References
Authoritative sources cited in this guide:
- Ontario Building Code 9.29 — Wall finishing standards
- ASTM C840 Drywall Standard — Drywall installation standard
Continue Reading